Off-camera flash for portrait photography can seem stressful for beginners. There’s more to learn and you have to buy and carry more equipment on your portrait shoots.
I’m here to tell you once you get started with off-camera flash, there is a good chance you’ll love it and may never go back to natural light portraits.
Getting Started with off camera flash
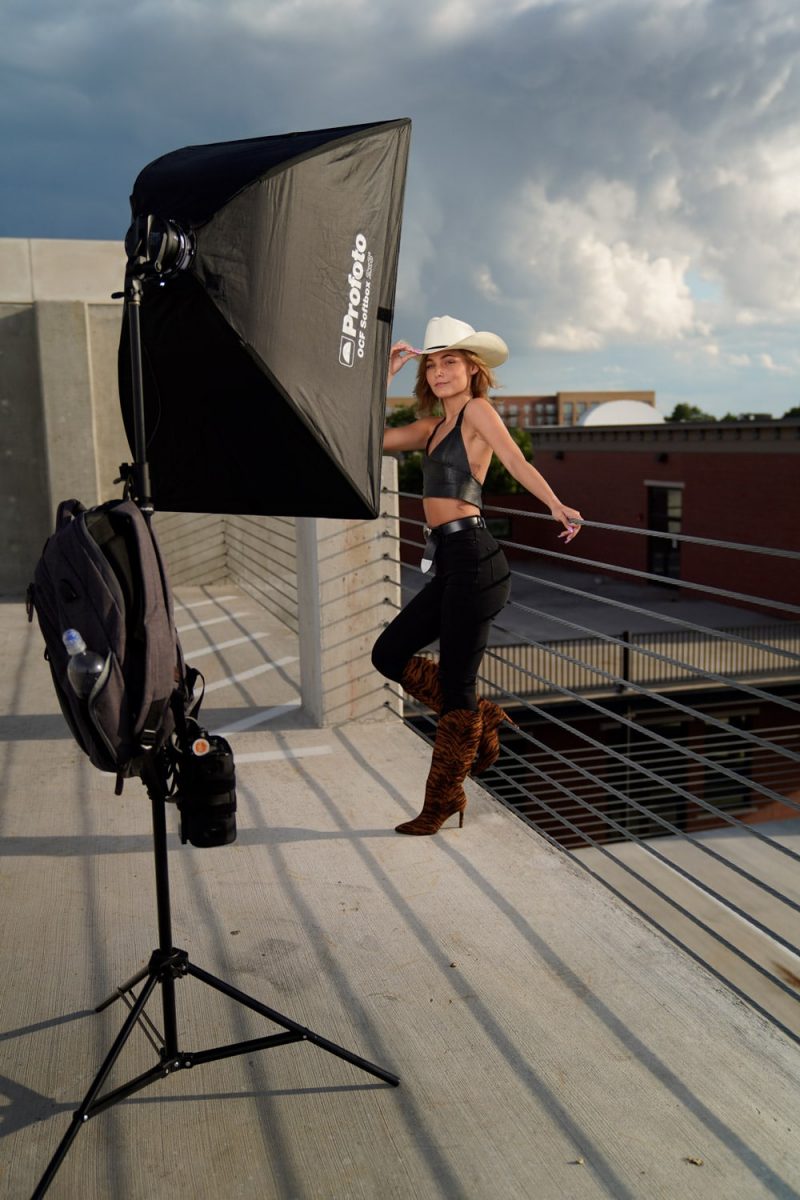
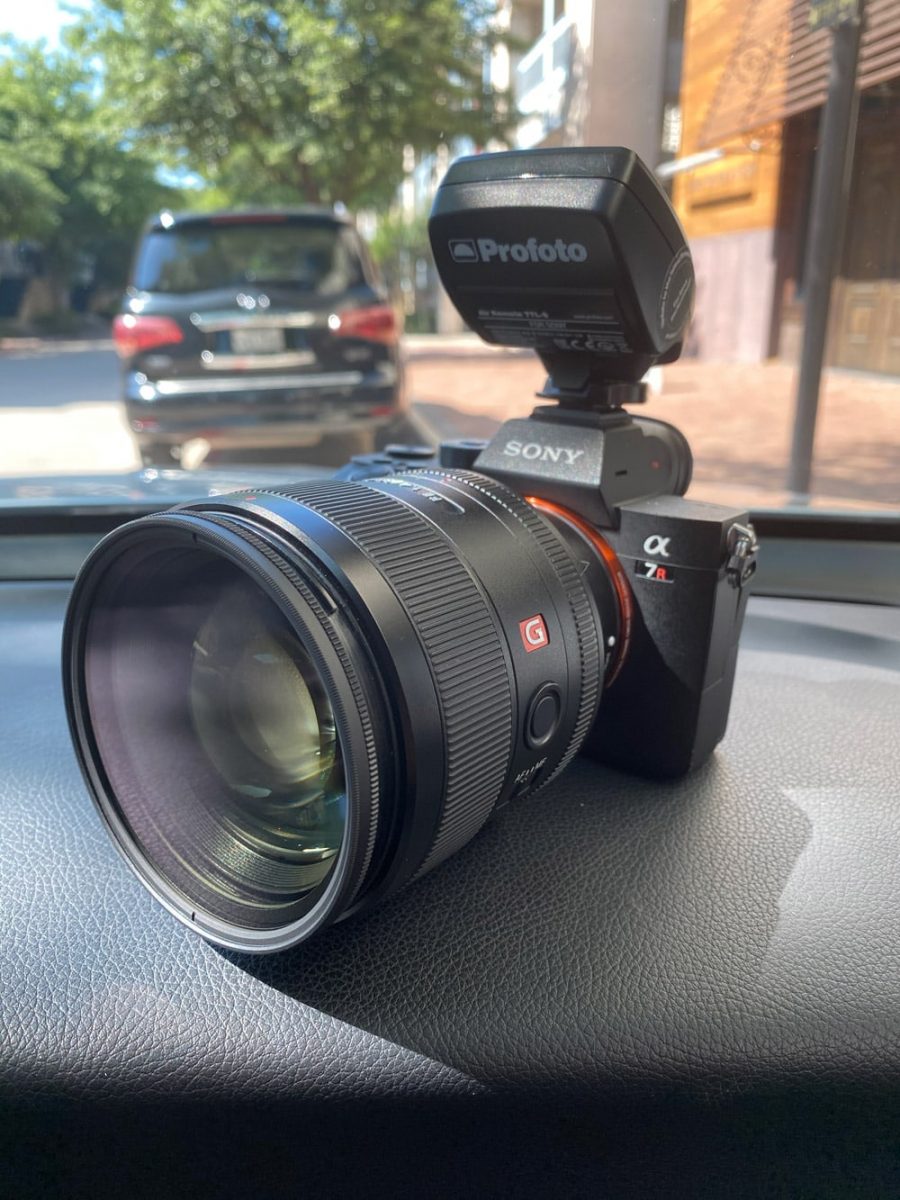
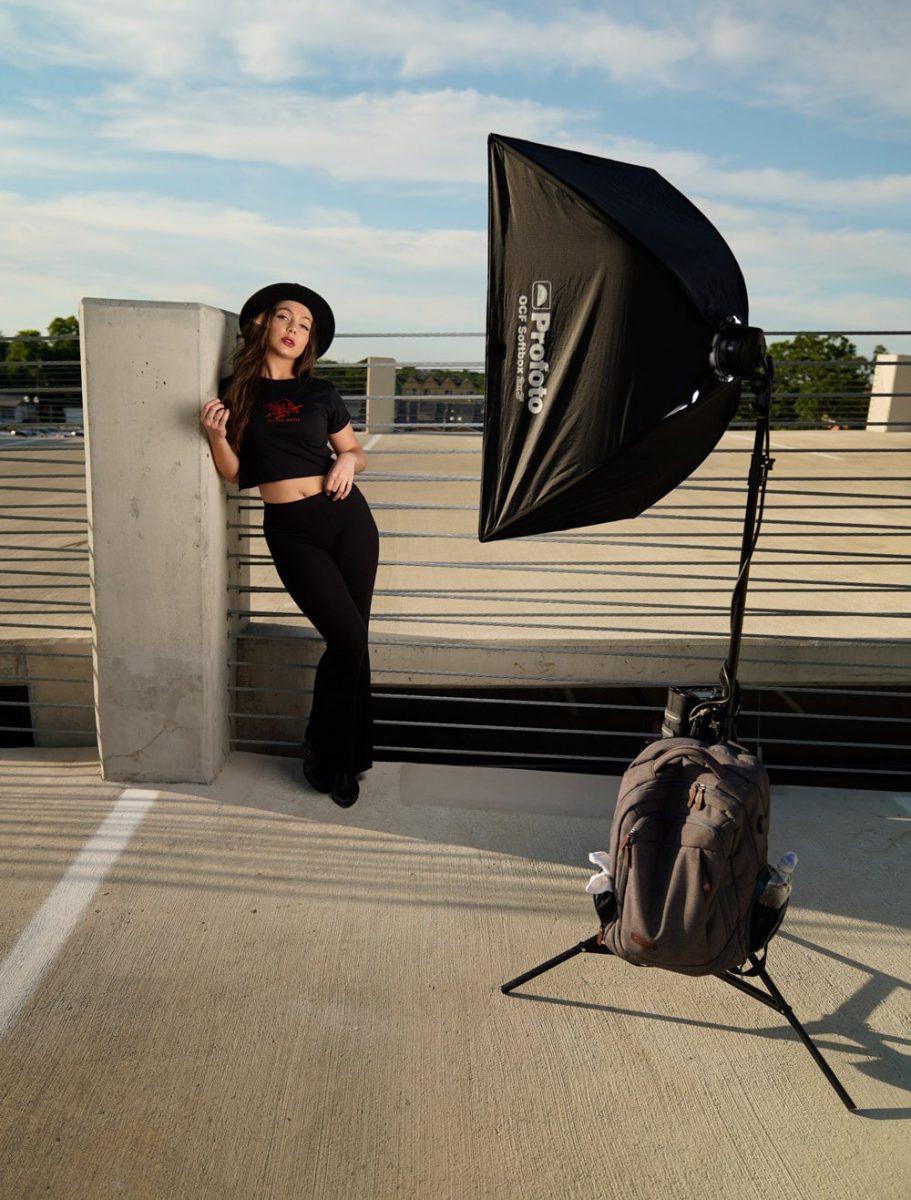
You will need a camera, flash trigger and flash strobe or speed light to get started. Once you have all three this is the basis for using off camera flash. In this review I will be using the Sony a7riii mirrorless camera with Profoto Air Remote and Profoto B2 Strobe.
Why Off Camera Flash for Portraits
Off-camera flash allows you to add a new lighting dynamic to your images. It also lets you shoot at different times of the day that normally might not be available for you with just natural light. OCF (off-camera flash) is a great way to broaden your skills as a portrait photographer and today we’ll be taking a look at getting started with off-camera flash.
This won’t be a technical breakdown of settings and specs. This will be a general overview of what you will need to get started with OCF lighting. Do your research on your specific camera brand and finding a compatible flash solution. There are many choices and strengths of speed-lights and strobes.
If you’re just starting out, I recommend checking out the Godox speed light flash system. It’s compatible with many camera brands and is a great budget friendly starter flash system for beginners. This will give you a great starting point and you can always upgrade later to larger and stronger flash units.
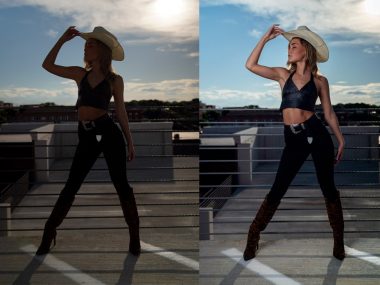
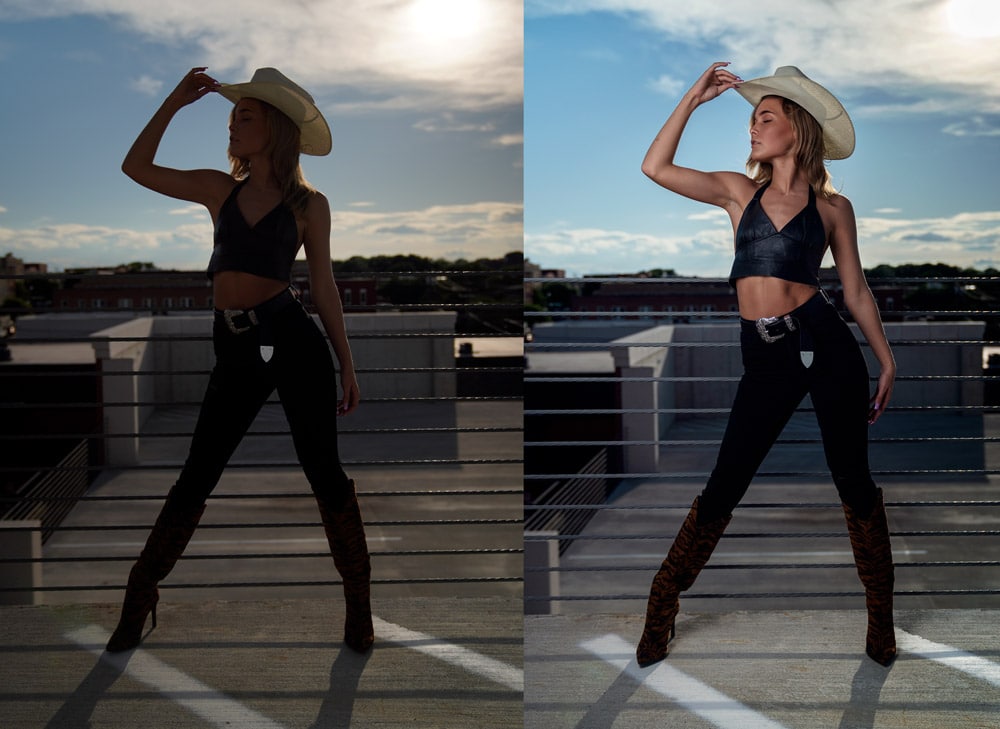
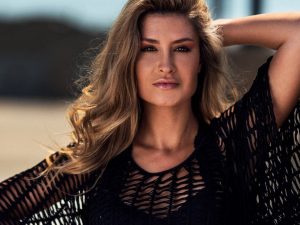
Example Natural Light Vs Off Camera Flash
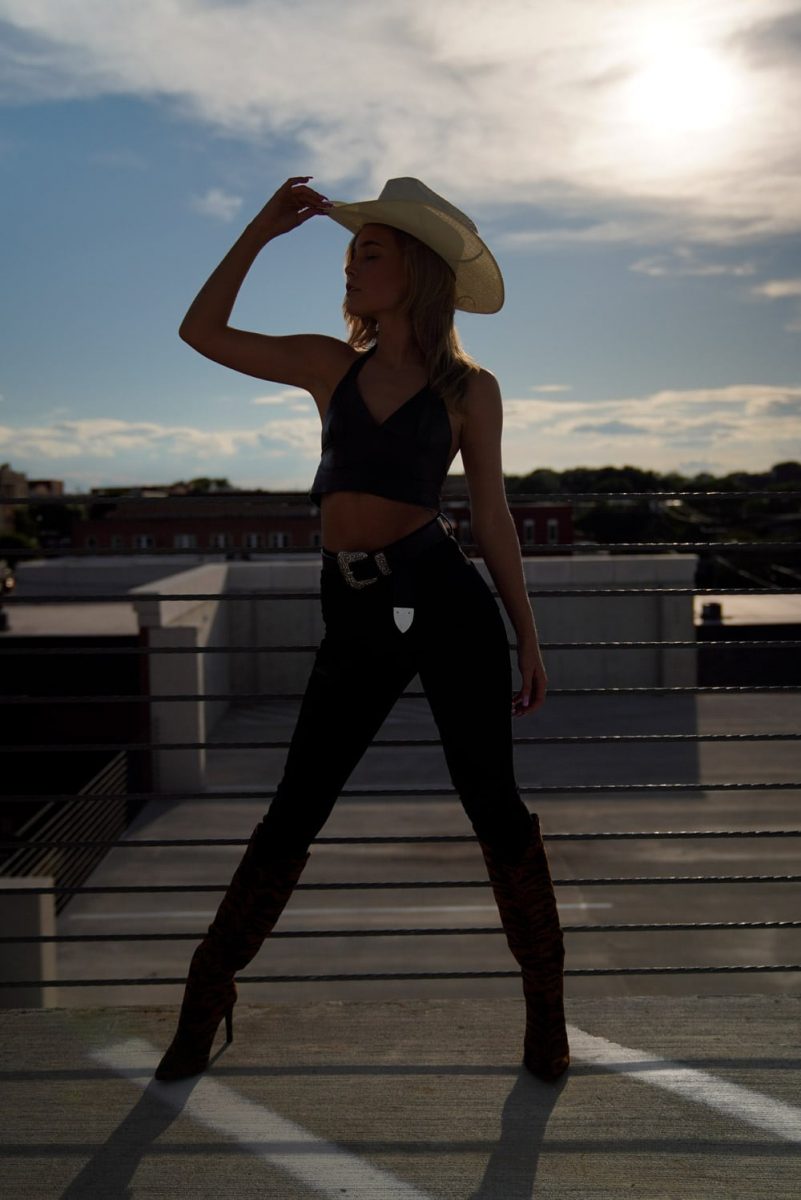
Here is an example of a natural light portrait with the sun as the main light in the background. You can see Ady is under-exposed from the front and the background is full of details especially in the sky.
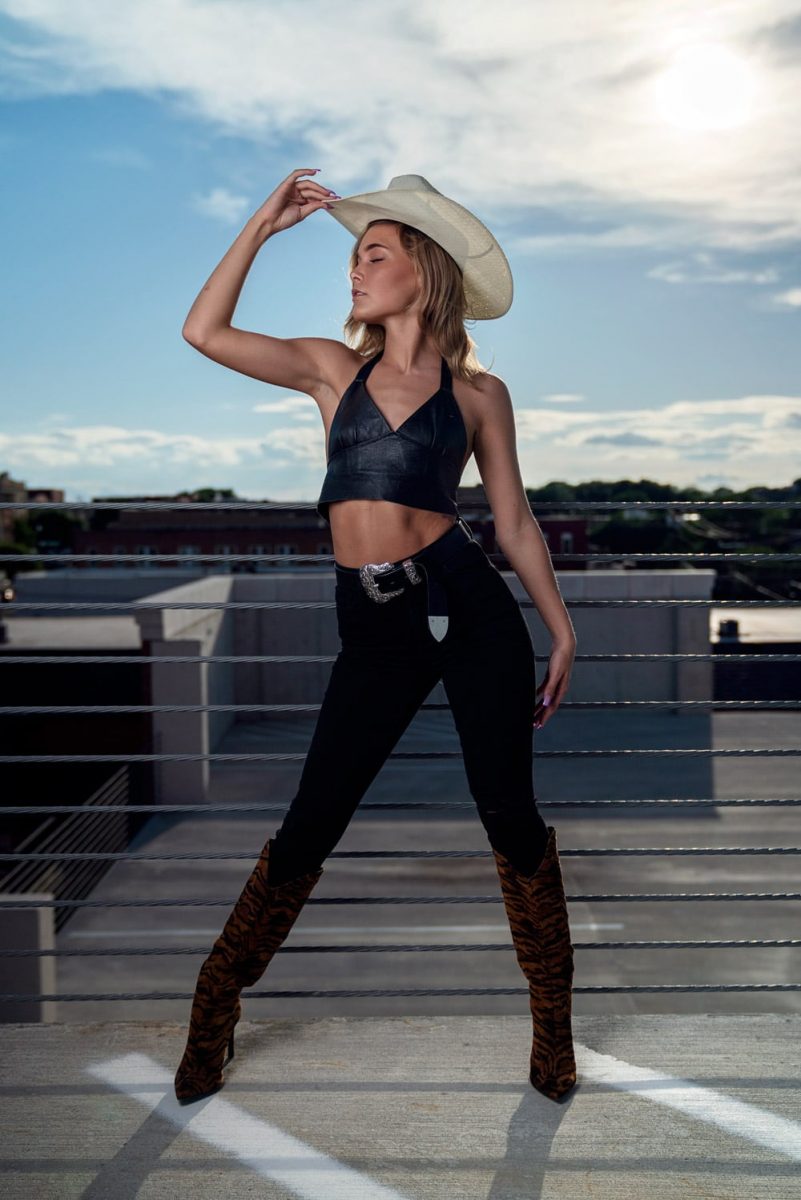
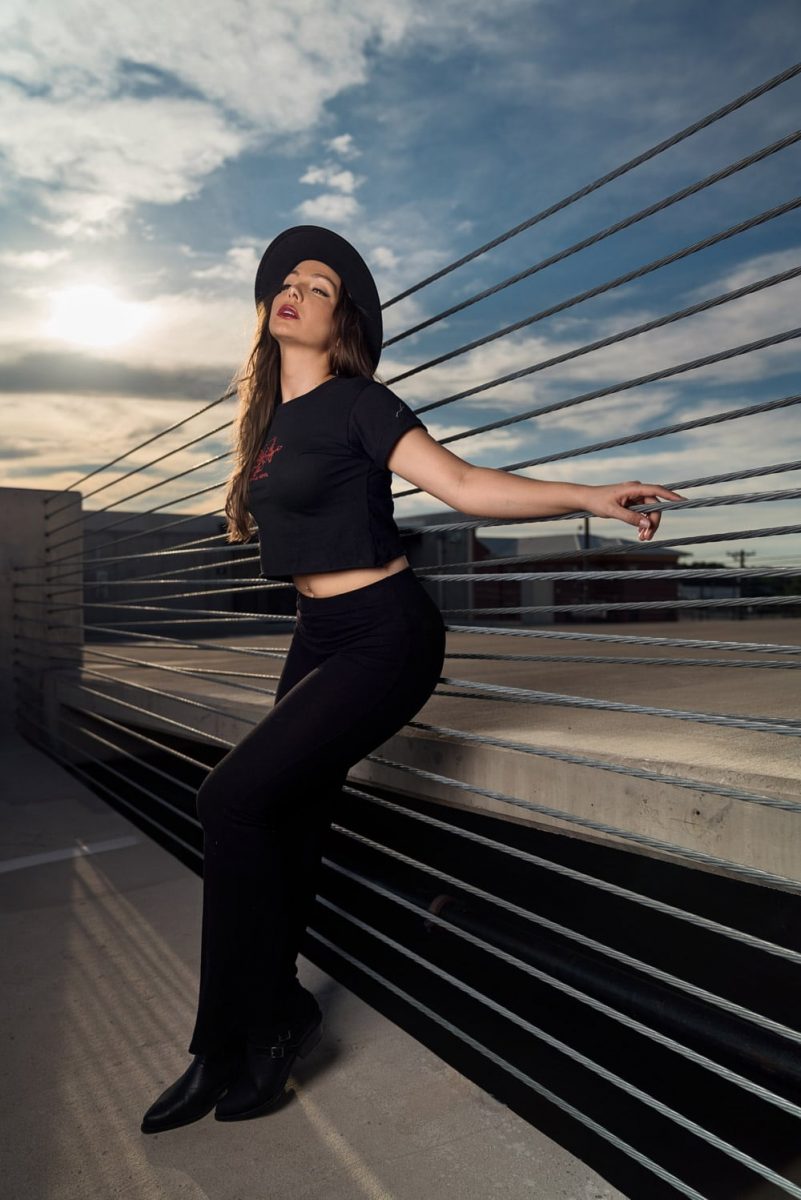
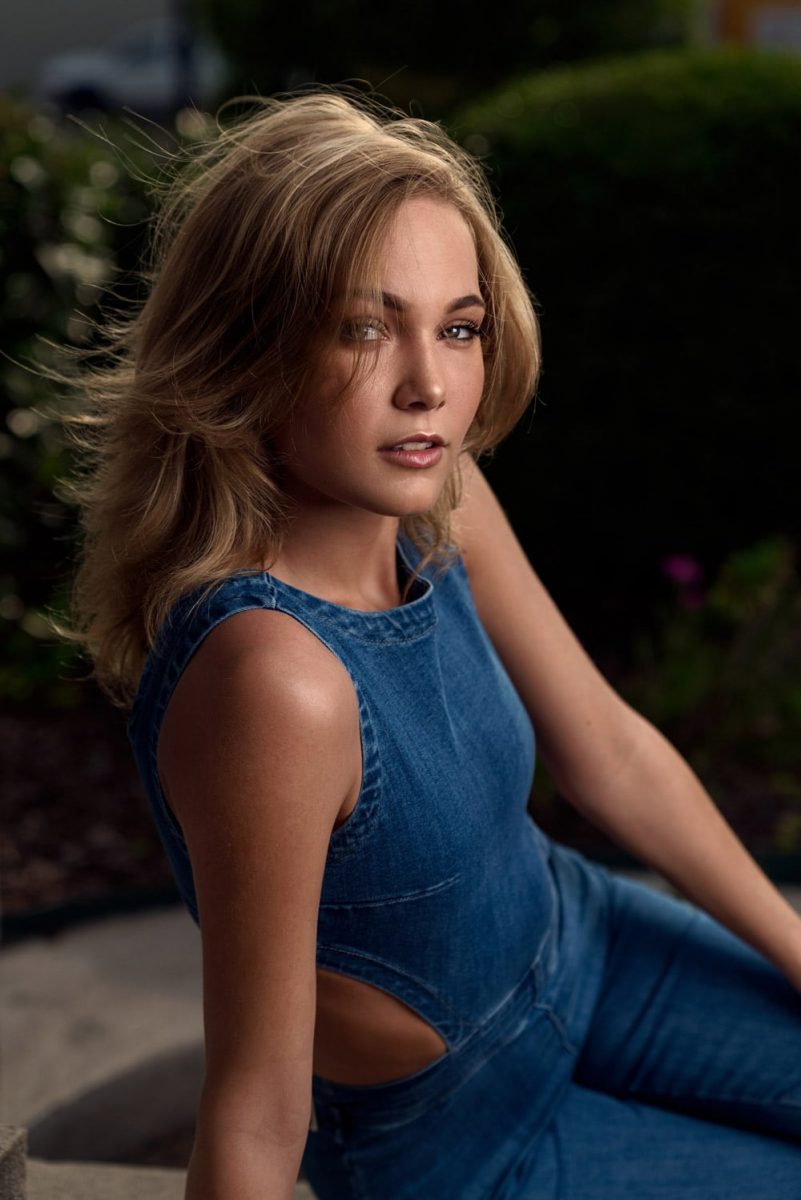
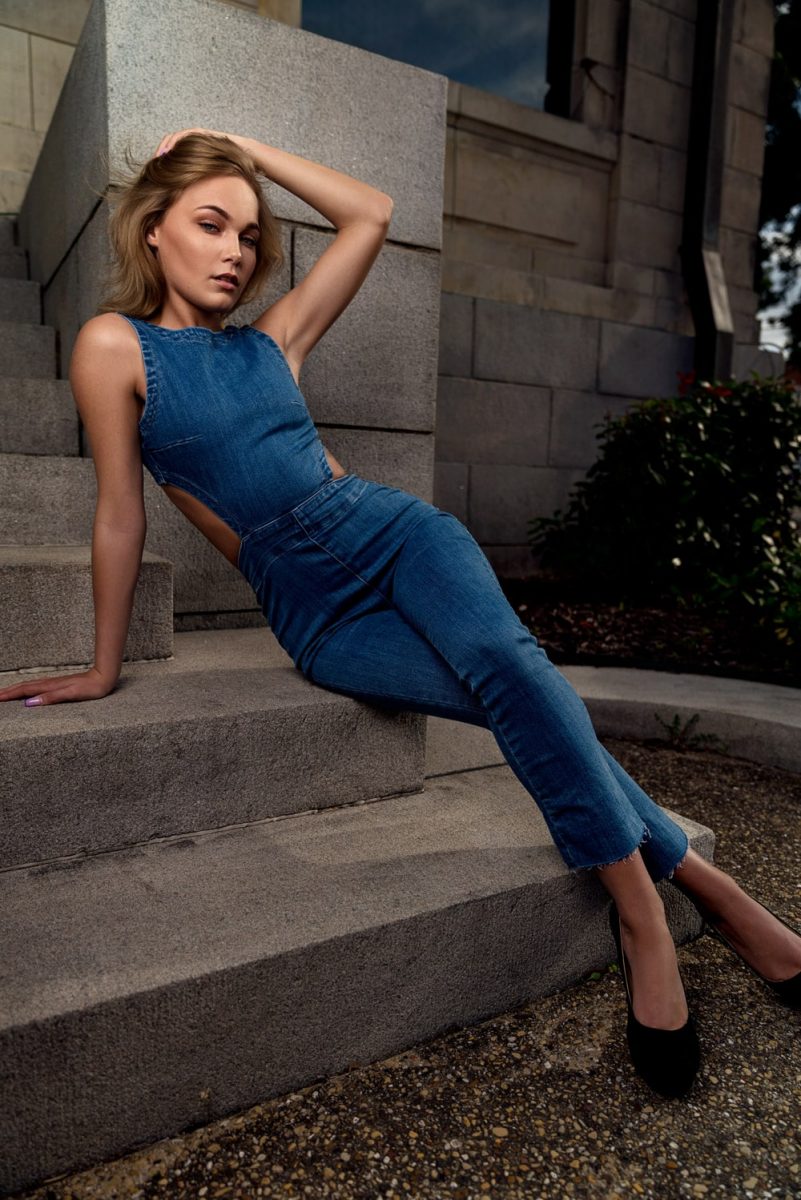
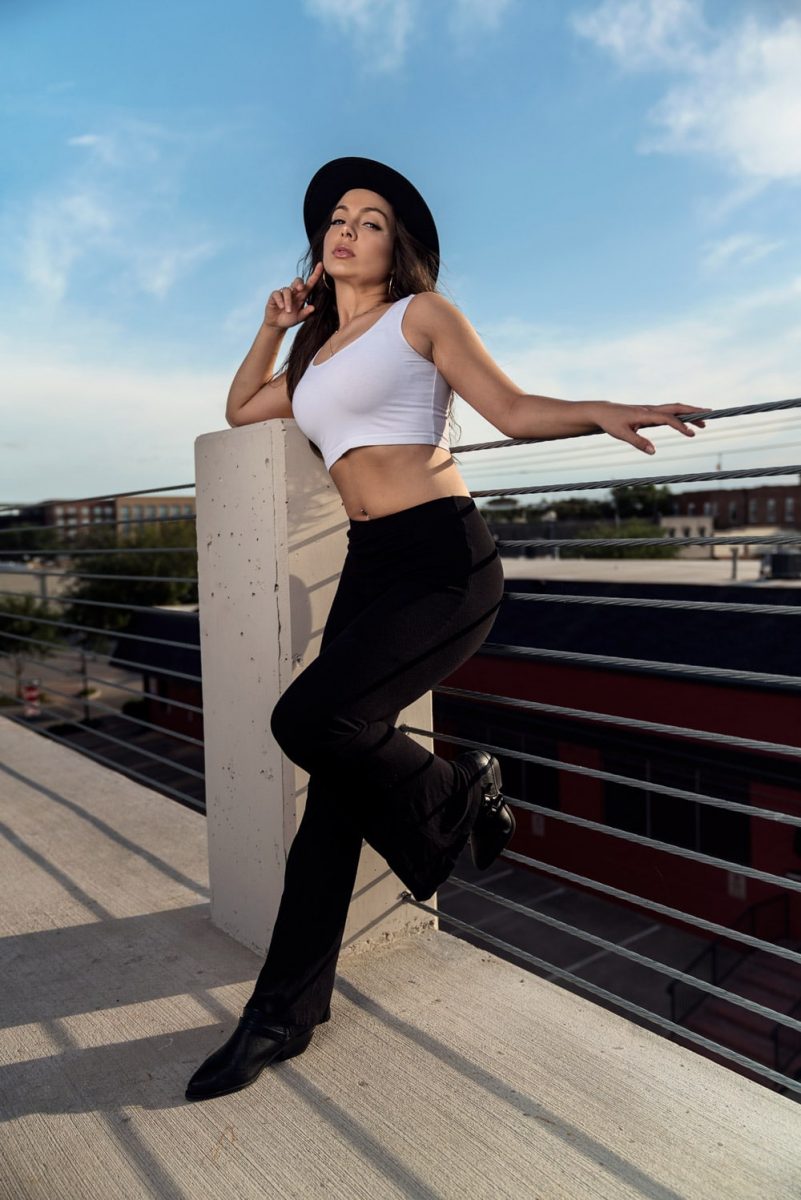
In this final shot of Ady, I used the Profoto B2 Strobe with a single 2×3 OCF softbox on the left side of the frame. The flash was about 2 feet away facing Ady. This final shot was edited using my custom preset and final tweaks in Photoshop.
What you’ll need to get started using Off Camera Flash
Camera – This can be any camera (mirrorless or DSLR). Must have a hot-shoe mount for the flash trigger. I use the Sony a7riii mirrorless camera as my main camera.
Flash Trigger – You will need a flash control trigger or radio trigger to remotely control your off-camera flash or strobes.
Flash or Strobe – You will need an off-camera flash speed light or strobe. This can be a small speed light unit or a larger strobe. Must be compatible with your flash trigger. I am using the Profoto B2 strobe I picked up used from Amazon.com.
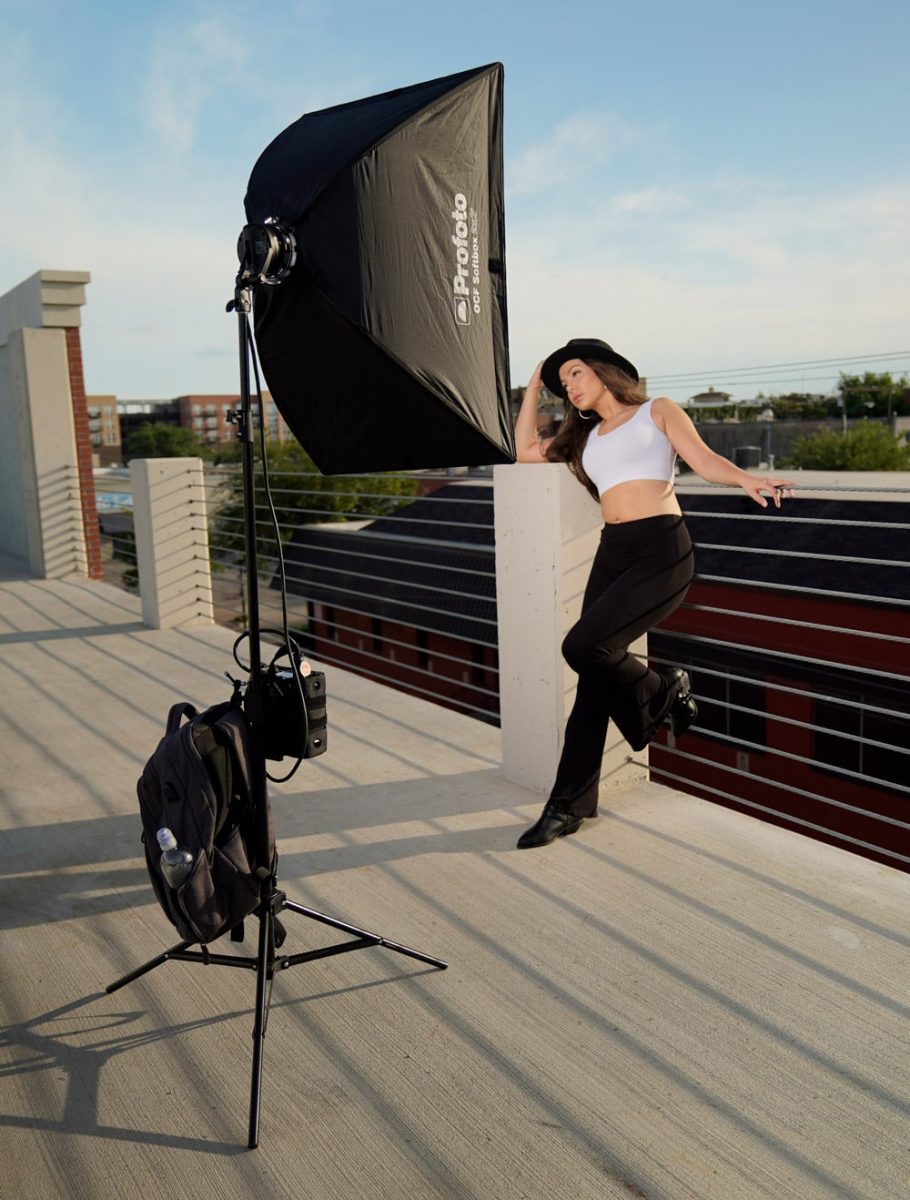
Light Stand – You will need a light stand to mount your flash or strobe and place near the subject.
Lighting modifier – This can be a small softbox, beauty dish or any other lighting modifier. If you don’t have one don’t worry, you can always add this later when investing in other equipment.
Don't Miss This

A few terms to know before jumping in
Ambient Light – This is the natural light coming from a scene. Normally this is the light from the sun or artificial lights from the studio or room you are standing in. This is the natural light your camera sees when setting your exposure.
Exposure – This is the amount of light that is hitting the sensor at any given time based on the settings of your camera. The more available light the higher the exposure. Less light available can create under-exposed images. Be sure to check your exposure setting on your camera when taking test shots.
Flash Sync Speed – This is the highest speed at which the shutter will open and close and still capture sync with your flash unit.
High Speed Sync – This is going beyond the normal flash sync speed of your camera and allowing the flash and unit to trigger at faster speeds than the native sync speed of your camera.
How to use off camera flash for portraits
Setting up your gear
The first step in shooting with OCF (off camera flash) is setting up your gear. Now there are lots of camera brands and flash combinations to choose from but you need to make sure you have a basic flash and radio trigger.
The flash can be mounted to any light stand and any modifiers can be setup and placed on the unit. The trigger is then mounted on your camera’s hot-shoe mount. Many triggers run off batteries that can drain pretty quick so make sure you have a back-up set just in case.
The flash unit should be around 2-3 feet away from your subject and slightly above at a 45-degree angle facing down. This is a good starting point. If the light and modifier are in frame just move the light back or adjust your distance to the subject so your equipment is out of composition.
Do a quick test
You’ll want to do a quick test to make sure the trigger is firing the off-camera flash unit. The trigger is radio controlled so you will need to stay fairly close to the flash. You can read the manufactures recommended distances and stay within these while shooting so you don’t have any miss-fires.
Make sure the trigger and flash are set to the same channel. I usually set my channel to “A” on both my trigger and flash. If you’re unsure about how to set your channel or flash do a quick YouTube search to help setup your equipment.
Make sure your camera is set to wireless flash or that the flash setting is turned on. With both flash and trigger on, you should be able to take a quick test shot and see the flash firing when the shutter is pressed on the camera.
If your test is successful then you can move on to setting the camera for the ambient lighting. If you’re still not getting the flash to go off, then refer to the manual with your trigger and flash and work thru all the steps again to get the flash and trigger to work together. Many speedlight units have different modes, so I recommend setting your flash to manual mode when getting started.
Start with your ambient exposure
The first thing after you test your equipment is to turn off your flash trigger. This will allow you to start with dialing in your settings for a base exposure. You’re going to want to expose your shot for the background or ambient light in the composition. Don’t worry about the subject. Just worry about how the background is looking and how it is exposed in your composition.
If you’re shooting outdoors you can start with some simple settings like f4.0 / shutter 1/160 sec / ISO 100. All cameras are different but this will give you a starting point to work with if you are just starting out.
Don’t worry about your subject for the moment. Just take a quick shot and see what the background looks like. If it’s too bright, then you will want to adjust your settings to darken the exposure. You can bring your aperture down to f5.6 or lower if you need too. Just a suggestion.
Vice versa if the background is too dark, you will want to bring up your settings to make the background lighter.
Take a few test shots and see how the background is rendering. You’re looking for an even balance of light and shadows in your composition. Once you have it just right and you like the amount of details and light then you can move onto the next step.
Don't Miss This
Turn on your flash to ¼ power
Once you have the background exposure it’s time to turn on your flash and trigger. Set the flash to ¼ power and take a test shot with your subject in frame. Do not touch any of your camera settings.
Do not change any of your camera settings during this test as your will need to re-test to get a correct exposure for the background again. Your settings should be dialed in to expose for the ambient light in the background so you’re looking to only adjust the power of the flash moving forward.
Raise power to get exposure
After you’ve taken a shot, if your subject is too dark, next raise the power of the flash. I would raise the power in half-stop increments so you can slowly see how the lighting is affecting your subject. You may need to adjust the lighting power a few times to get a proper exposure on the subject.
Test and test again to dial in the lighting and to get the style you’re looking for. Remember the closer the subject is to your light, the softer the light will be if you’re using a softbox. You may also need to raise the power of the light higher if you’re using a diffusion layer in your softbox.
Adjust lighting as needed
I would look into feathering the light from your subject and testing to see if you like the results. Feathering means directing the center point of your softbox either just in front or just behind the subject. This allows the larger broader parts of the softbox to hit the subject and not the center spot.
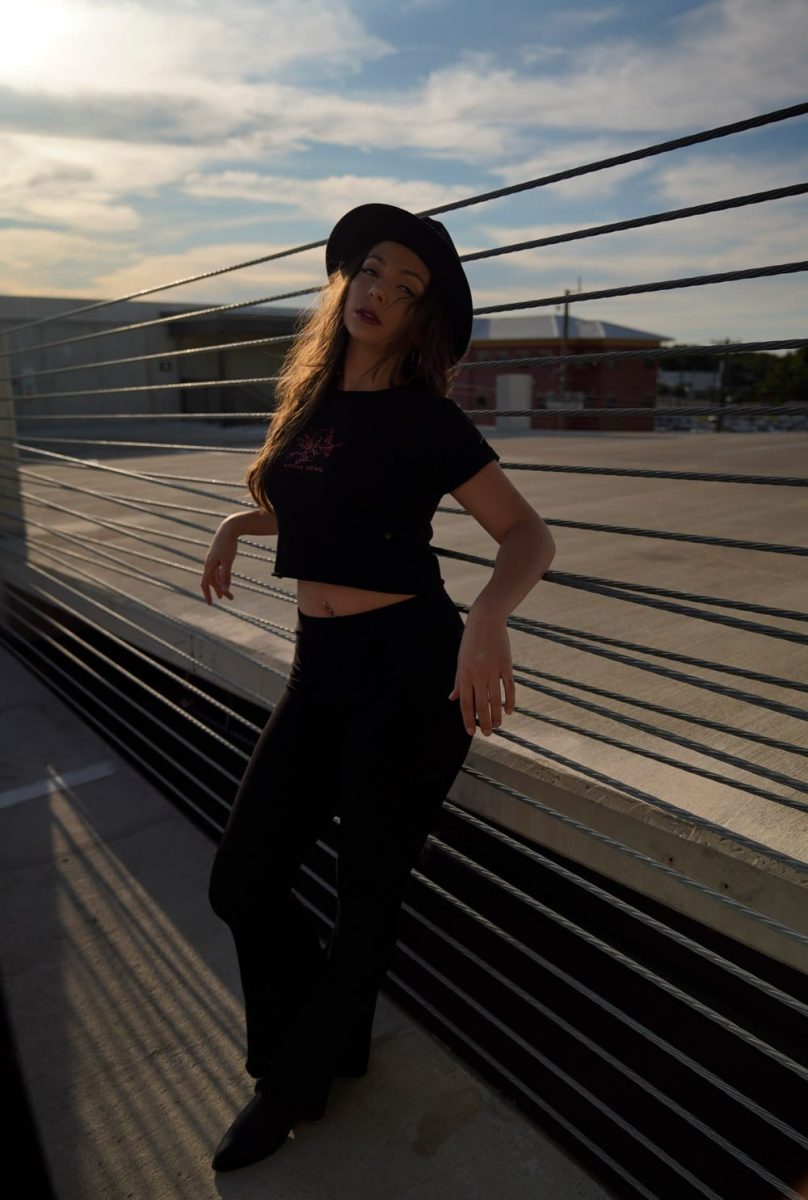
Take portraits
Once you have the lighting in place, it’s time to take a few portraits. Have your subject move around and show you a few different poses. Don’t let the subject get too far or drastically change distance from the light as this will change your exposure. You will need to adjust the lighting as needed as your session progresses.
Off camera flash portraits final edits

High Speed Sync
Every camera has a flash sync speed. This is the fasted speed the shutter can open and close and catch the lighting from your flash unit. It’s technically more complicated than that but for the purpose of this article we will keep it simple.
If you’re shooting portraits with a faster shutter speed than your cameras sync speed you will get a black shadow in your image. Many flash units now come with HSS or High-Speed Sync.
This means the flash and trigger can operate at a faster speed than the shutter of your camera so that you will not get the black banding in your image. HSS comes in handy when you have a really bright outdoor light and you need to raise your shutter speed to a faster setting but don’t want to adjust your ISO or aperture.
The flash sync speed of my Sony a7riii is 1/250 sec. This means I will need to make sure my flash has HSS mode if I want to raise the shutter over 1/250 sec. This allows the trigger to fire the flash at a speed consistent with my shutter.
There are tons of videos on HSS on YouTube so check out a few and do your research on your camera brand and camera’s flash sync speed if you’re having issues with black banding over the image when using flash.
Why use Off camera flash?
Off camera flash will open a world of possibilities for you and your portraits. You can add multiple lights or strobes and really dial in a specific look for your portraits and images. You can add gels over the lights and change the entire mood of a portrait shoot.
Most importantly, OCF lighting gives you complete control of the lighting in your environment and allows for much more creative freedom. More and more professional photographers use OCF lighting to either control or supplement the lighting in their portrait shoots. Finding the right balance is key to getting the look that you want.
Conclusion
Off camera flash shouldn’t be scary but I know many people who still don’t take the time to learn it. I started with only natural light but after a few years I moved to OCF lighting and I never looked back. The control it gives me and the dynamic look of my portraits can’t be replicated with just natural light.
Take the time and do your research. Learn more about starting with off camera flash and you won’t regret it. Best of luck!
[wptb id=3129]