

Many portrait photographers learn the basics of photography from trial and error. There is nothing wrong with this route, but there are a few tips that can help you take better portraits.

How to Improve Your Portraits
Place your subject in soft lighting areas or in the shade away from the harsh sunlight if you’re shooting outdoors. Make sure your background is not too busy and that your subject is the main focus of the composition. Let your subject fill more of the frame and this creates more focus on their expressions. Lastly, place small items in front of your lens and shoot though them in order to create front bokeh. This creates beautiful foreground blur and adds interest to your portraits.
Now that I’ve explained a few tips, let’s discuss these more in detail and dive into a few more.
1. Soften the light on your subject
Harsh light can result in unattractive shadows and bring our blemishes in the skin. This results in less appealing portraits and more post production editing.
Softening the light outdoors
Instead of blanketing your subject in light, try softening the direct light by placing your subject in the shade. If your outdoors, place your subject next to a large building or in the shadows of trees or other structures.
The indirect light will still light your subject but you will get more even shadows and coverage on your model.
Softening the light in studio
In studio, diffusing the light can soften the image to produce a more natural looking portrait. Diffused light helps decrease the sharpness of shadows and tiny details on your subject.
This helps hide unflattering lines or blemishes and provides an even tone across the face and body. One tip is to use soft boxes or other lighting modifiers.
Soft boxes provide the easiest way to diffuse light in studio when using flash. The soft box sits around the flash, redirecting the light in a larger area. This lighting then wraps around your subject and creates less harsh shadows.
Another possibility is to use a 5-in-1 reflector to bounce light back onto your subject when in the shade. This way you can keep them in a shaded area to tone down the harsh shadows from the sun but redirect the light and help fill in some of the shadows.
Many reflectors also have white diffusers that can be used to block and refract the light onto the subject in your portraits. If you have an assistant, have then stand next to your subject and use the diffusor to block the sun and create softer light.
Lighting is an important part of creating better portraits so practice with different techniques to improve your portraits.
2. Choose the right background
Portrait photography requires you pay attention to your subject. However, the background is just as important. Elements in the background may detract focus from the portrait so you want to be aware of your surroundings.
If you shoot outdoors, take the time to find the right setting. Pay close attention to your surroundings to avoid letting other objects become focal points of the image.
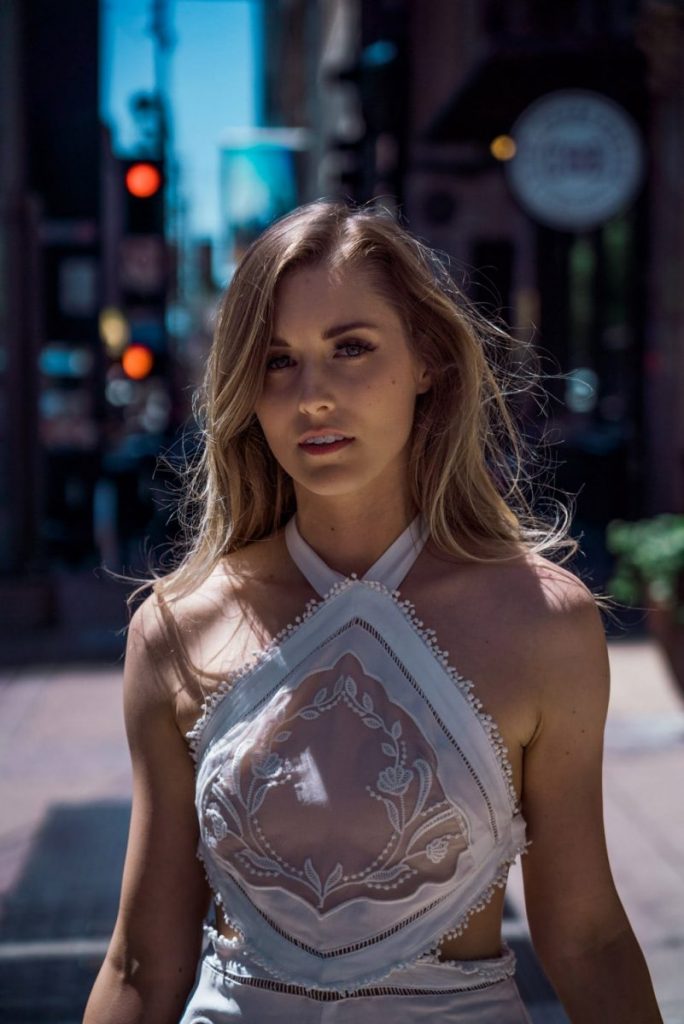
For example, a telephone pole or cars passing in the distance may steal some of the attention from the subject when shooting outdoors.
Creating bokeh to defocus the background
Some photographers recommend using bokeh or blurred backgrounds for portrait photography. You can achieve this by using a larger aperture like f1.8 or f2.8 and isolating your subject from the background.
Control colors in your composition
The colors in the background may also impact the quality of your portraits when taking photos outdoors or in a studio. You typically want contrast between the subject and the background colors.
This helps them “pop” in the photo.
Contrast helps draw attention to your model but you also want to consider colors and textures and use these to your advantage.
3. Fill the frame with your subject
Beginner photographers are often more hesitant to get close to their subjects. While you likely want a variety of shots from different distances and angles, you should also ensure that you capture close-ups detailed shots.
Don’t be afraid to fill the frame with your subject. Make them the only focal point of the portrait. Close-ups help eliminate the risk of elements from the background being too distracting.
Follow the Rule of Thirds
When moving further or closer to your subject, remember to follow the rule of thirds to keep your subject properly aligned in the frame.
The rule of thirds for photography helps with the composition of your shot by ensuring that the layout is pleasing to the eye.
If you’re not sure how to turn on your composition lines in your camera, do a quick YouTube search for your camera name along with turning on composition lines.
The subject’s eyes should be about one-third from the top of the frame. The subject’s face may also be positioned within the left or right two-thirds of the frame.
Use a telephone lens for closer shots
Using a telephoto lens can also help bring your subject closer while blurring more of the background.
However, avoid using too narrow of a lens. If you typically use a 50 mm lens, try using an 85 mm or a 100 mm lens. Even zoom lenses like the 70-200mm are great for portrait photography.
4. Focus on the eyes
Focus on the eyes first when lighting your subject and continue to adjust their position to keep the catchlight positioned near the top of their eyes. Don’t stress if you can’t get this right every shot.
The catchlight helps add more depth to the eyes, making your portrait more dynamic and lifelike. It’s the reflection of your light source in subjects eyes that makes the shots unique.

The eyes are considered the most important part of the portrait, as most people tend to look at the eyes first.
Lighting for the eyes ensures that you capture as much detail as possible in your subject’s eyes.
The catchlight is typically produced by the key light in your lighting setup. As your light source moves the catchlight will move, which may require you to reposition your subject for your shots.
You can also enhance the appearance of the catchlight by having the subject hold a reflector in their lap if you are shooting in studio or are stationary outdoors.
The catch light highlight can be enhanced in post-production, but it’s always great to get it right in camera if possible.
5. Use foreground bokeh to frame your subject
Bokeh is not just created in the background of your portraits. You can blur out foreground objects in order to bring more attention to your subject and create more depth in your photo.
What is foreground bokeh?
Foreground bokeh happens when an object is in frame but the camera is focusing on the subject behind it. This creates a soft blur effect as the lens isn’t focusing on the object.

You can use foreground bokeh to draw attention or even frame your model.
Many photographers have small objects that they place in front of the lens including: coins, flowers, plants, and more.
Practice adding these elements to the front of your lens and experiment to see what you can create.
If you’re on location, consider using plants and flowers and even fences or bars to shoot through and create this visual effect.
6. Build trust with your subject
The comfort of your subject directly influences the quality of the portrait.
The camera can pick up subtle cues in body language that may result in a less flattering image. The best way to overcome this problem is to build a bond with your subject.
Instead of immediately getting your subject into position and snapping photos, take the time to have a conversation. Wait for them to relax a little before you dive into the photo session.
Communication and compliments are key
Giving your subject praise throughout the shoot can also boost their confidence. For example, after capturing a shot, you may say, “That shot looked great. Let’s try more of this posing style.”
Small compliments and directions can help keep your client comfortable and help reduce the risk of awkward silences.
Music always helps as well, so consider having a small Bluetooth speaker on hand to play your favorite jams. If you’re interested, here are some uncommon photography gear that everyone needs for portrait shoots.
You should also avoid negative words when directing your subject.
For example, if the subject recommends a pose that you dislike, you may try, “That looks good, but would you mind trying this instead.”
You may be working with models and clients for the first time on site, so do yourself a favor and take some time to learn more about the person.
This will make the session go more smoothly and will result in better photos.
7. Keep shooting to capture candid photos
Some subjects never relax, which can make it more difficult to capture quality shots. You may occasionally work with models who remain rigid and stiff throughout the shoot.
Wait for them to let their guard down and do your part to help them get more comfortable.

The best way to capture your client when they do not expect it is to keep shooting. You can take hundreds of shots to ensure that you don’t miss the moment when your subject is completely relaxed and not posing.
Continually take photos of your subject as you talk and direct them into different poses.
Telling jokes or asking questions that lead to authentic responses can help you capture your subjects in the best light. As they respond they may crack a smile or look off in the distance.
You should also try to keep the session flexible and fluid to prevent your subject from tensing up.
Instead of standing in one spot as you snap photos, move around so that you can try shooting from different angles. Give them something to follow and distract them from their own mind. It’s all about the experience.
Bonus Tip: Find locations familiar to your subject
The fastest way to help your model or subject get comfortable is to find a location that they are familiar with. If you are shooting outdoors, find a park or downtown area that the model has been too before.
They will recognize the area and immediately feel more confident because they know where they are. They may even be able to tell you about some great unknown or secret spots close to your locations.
Each shoot should be approached as a collaboration and if you’re unfamiliar with a new location, and your subject knows the area, then use this to your advantage.
Don’t be afraid to ask for recommendations or more ideas. This will help the session along and give you common ground for conversation.
Final thoughts
If you want to improve your portrait photography, start experimenting with the tips discussed. Soften the light, choose the right background, get close-up, use foreground bokeh, light the eyes, build rapport, and most important, just keep shooting.
Along with these tips, continue to explore new photography techniques and look at the work being produced by the leading portrait photographers in your area.
Social media is a great place to find inspiration, just don’t get caught up in copying someone else’s style.
Keeping up with the latest developments and trends can helps inspire you to get out and shoot more portraits.