I’ve made plenty of mistakes my first few years as a photographer, and I’m pretty sure I’m not alone.
I also made plenty of photography mistakes without knowing it. I’ve learned from these experiences and tried my best to fix my beginner mistakes.
Most common beginner portrait photography mistakes
For the sake of time, here are 10 beginner photographer mistakes that I know everyone makes when starting portrait photography.
- Getting too many blurry images (always shooting wide open)
- Shooting in harsh light or bad light (not knowing the difference)
- Over-posing models and not letting them move naturally
- Not enough communication and feedback during your shoot
- Going over-board on post-processing and photo editing
- Spending too much money on photography presets
- Comparing myself to others on social media
- Not taking the time to learn from the pros
- Shooting random concepts and not building your look
- Shooting too much and getting behind on edits
These are just a few examples, and If you’re interested in learning more about how to fix these mistakes, then stick around and check out the rest of this article.
I’ll talk about each mistake and how you can easily find solutions to get you in the right direction.

Beginner Mistake #1: Shooting wide open and getting too many blurry images
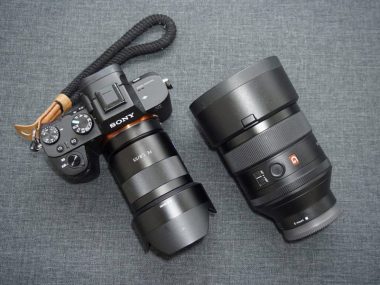
When you purchase a fast lens that can open to f1.4 or f1.8, as a beginner, you just set the aperture at its widest and never move it again. I know I did this, and I missed focus on many shots.
This is a big mistake as it can cause you to miss focus on your subject’s eyes or face because you are dealing with such a narrow depth of field (focus area).
You will most certainly get blurry images in combination with slow shutter speeds because your camera is not set to capture motion.
The solution to blurry images because of your aperture and shutter speeds
Start with small changes and move your settings from there. If you’re shooting portraits and getting blurry images, then try to raise your aperture and shutter speed a bit instead of shooting wide open.
For example, raise your aperture to f4.0 or f5.6 and set your ISO to 200 or 400. Then move your shutter speed last so that you are balancing out the exposure of your scene. Your shutter might go up to 1/2000 sec or more if you are dealing with a bright scene.
Take a few shots and see if you’re getting more images in focus.
We see other photographers’ work and assume they are shooting wide open all the time. You don’t need to shoot wide open for every shot to get great subject separation and nice blurry background bokeh.
Depending on your distance from the model, you can shoot at f2.8, f3.2, and even f4.0 and still get clear separation and creamy background blur.
I find it helps as a starting point to maximize your chances of hitting focus. You can always adjust as needed or as you become more comfortable opening up your aperture.

Beginner Mistakes #2: Shooting portraits in bad light or harsh light
There is nothing wrong with shooting in harsh light or the middle of the day, but I recommend avoiding it if possible as a beginner.
You can get unwanted shadows, and it can be hard to get correct exposure if you don’t have much experience behind the camera.
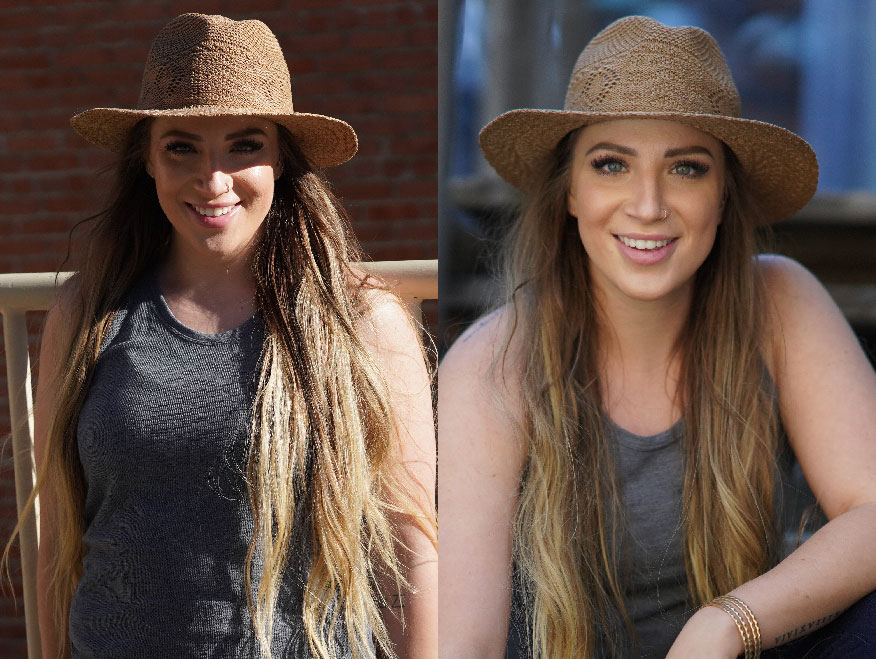
I ended up having models with dark circles around their eyes and heavy sharp shadows running across their faces because of the bright sunlight outdoors.

This type of portrait is great if you want that style, but it wasn’t the look I wanted. I’m sure other photographers have run into this same issue.
Solutions to bad lighting or harsh lighting
If your only choice is to shoot in harsh light, then here are a few tips. Face your subject away from the sun and use a reflector to bounce soft light back into your model.
You can get an inexpensive 5-in-1 reflector from amazon.com or your local camera store. This can come in clutch when you need to bounce light and get better shots in the harsh light.

Here is an inexpensive reflector that can be delivered to your door in a matter of days.
If you don’t have a reflector on hand, then consider moving the subject into the shadows of a building or tree.
This will let light bounce all around your subject, and you will get rid of those harsh lines from shadows on the face.
You can also use the reflector to block some of the harsh light.
If you find yourself with not enough light, I recommend getting a small speed light for your camera. You can bounce the light off walls and ceilings so you can get better exposure for your shot.
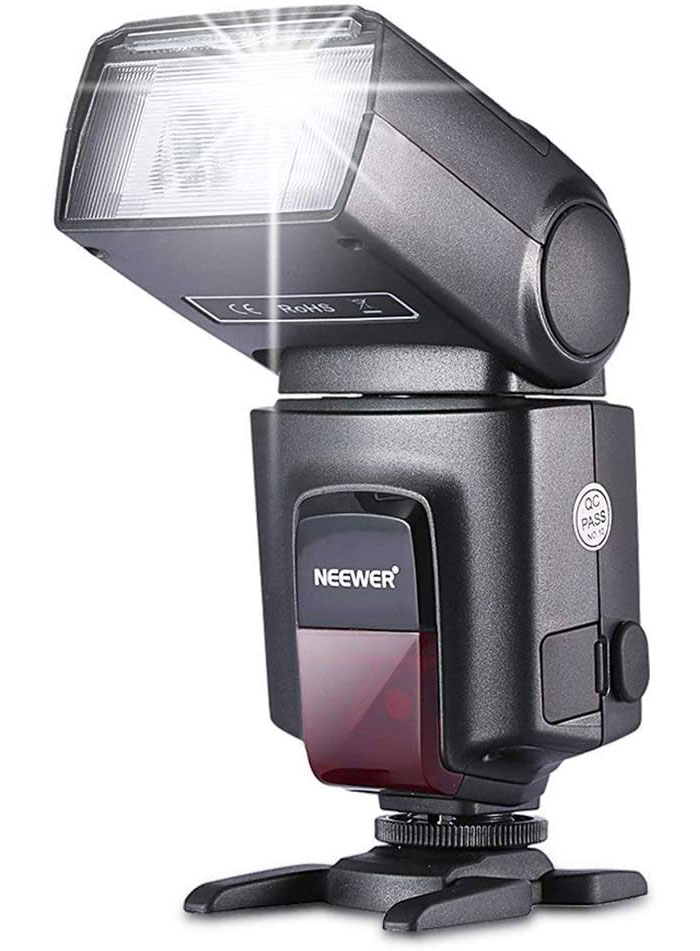
You can check out some simple speed lights here to add to your camera bag
These tools can help you balance light better while on location and are inexpensive accessories that every photographer should have in their kits.
I don’t always recommend shooting with an on-camera flash, but there are some times it will really make a big difference.
Beginner Mistakes #3: Over posing models
Depending on the experience level of your model, you might have to give a bit more direction than normal.
I’ve worked with many new models who are learning to pose for portraits, and they always appreciate feedback during the shoot.
When I first started, I thought I needed to tell the models how to pose for each shot, and I heavily influenced the posing positions during shoots.
This led to the models looking stiff and getting shots that looked very unnatural because I was very inexperienced.
I really didn’t know what I was doing, and I didn’t realize I was over-directing. I was trying to look confident, but I’m sure I was making things harder than they needed to be.

Solutions for natural model posing and getting better shots
The best thing I did to fix this was to study posing and worked on getting better at communicating my thoughts and ideas.
I still give direction to the models, but my direction is more movement-based, just like acting.
One thing I do is never keep models in a single position for too long. I have them doing micro-movements and keep them updated on how the shots are looking.
Music is a great tool to have on hand to give the model confidence and let them get into a good groove.
I give feedback as I’m taking photos, and I also share these with my models more during the shoot.
The more and more feedback you give to the models, the better your ideas can come across and the higher chances you will get the shot you’re looking for.
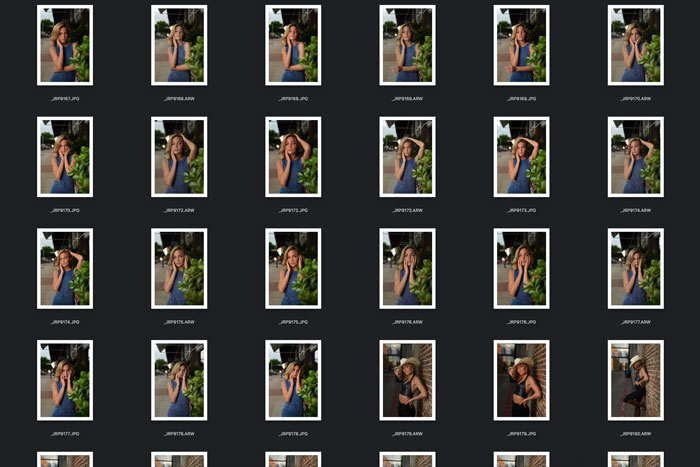
I shoot with Sony mirrorless cameras, so after each set, I transfer 3-4 pics to my phone from my camera to show the models.
I find this to be a great way to build confidence for my models and me during the portrait shoot. It’s instant feedback, and they get to see their images on a higher quality screen.
Beginner Mistakes #4: Not communicating enough with your teams
Communication is one of the keys to success in a portrait shoot. From pre-planning to the final shoot, you need to have as many details planned out as possible.
Collecting your ideas is not just for creative purposes. You’ll need to learn to document the concepts you have in mind and share these with your teams.

Solutions for learning to balance communication and creative ideas
The process of getting organized starts with you. Take the time to gather your ideas and create mood boards before the shoots. Use online apps to help organize shoot details and share these with your team.
I‘m in constant communication with my models and my teams on the shoots I organize. I like to help answer any questions before and during the shoot, so everything goes as smoothly as possible.
Make sure to double-check that everyone has the correct details before your session and that you review your ideas right before the shoot.
Beginner Mistakes #5: Heavy post-processing of photos
When I first started photography, I thought the skin and hair of my subjects needed to be flawless.
I would spend hours on a single edit, and the result would make my models look plastic and unnatural.
Photographers on Instagram would do heavy post-processing and color toning, and I thought this was the key to likes.
I worked to hide or erase every wrinkle and shadow on my model’s face, and I was always disappointed with my results when I compared them to other work. I was very wrong.

The solution to heavy post-processing
The solution to heavy post-processing was online learning and re-training myself to edit.
I started studying professional photographers and not just social media influencers.
Watching online courses helped me understand post-processing, editing, and what to look for to define my own personal style.
I ended up getting faster with Photoshop and getting faster with photo delivery. My images came out more natural, and I was much happier with the results.
Beginner Mistakes #6: Purchasing too many photography presets
In a world of YouTube and social influencers, we all want to make our photos stand out online. We see ads daily in our feeds that promise to make our photos look the best with one click.
Many will try to convince you that you need presets to make your photos look like theirs, and the likes will come rolling in. This really is a big beginner mistake in portrait photography.
The problem is you shoot differently from other photographers. Presets are made to cater to a specific photographer’s own shooting style, and it can be difficult to replicate the exact results.
Don’t fall into the trap of purchasing presets from every photographer you follow. This can get expensive, and you may be constantly disappointed with the results.
Don't Miss This

The solution to purchasing too many presets
Put the credit card down for a moment. There is nothing wrong with purchasing presets. I want to make that very clear.
The goal of presets should not be to click once and think you’re done with your image. Use presets as a foundation to learn post-processing.
If you purchase presets from your favorite photographer, then study the files to learn how the settings affect your images.
Learn what all the sliders do and how each section affects your images.
Eventually, you’ll learn to make your own presets, and you won’t need to keep buying more and more. This will be a big money saver in the long run.

Beginner Mistakes #7: Spending too much time on social media
Social media was a large influence on my photography, and I’m sure it does for many of you reading this article.
I spent hours browsing profiles and looking through comments to see what gear and settings my favorite photographers are using.
I should have used this time more wisely, but I was more interested in gaining followers and not making progress on my photography skills.
Solutions for relying heavily on social media
Social media is not all negative and should be seen as a source of inspiration for photographers.
You need to understand the difference between inspiration and competition in your mind.
Use social media as a way to connect and share your own ideas and creativity. Stop concentrating on the likes and spending so much time reviewing other people’s work hoping to find the secret formula to being social media famous.
If this won’t work for you, I would actually recommend taking small breaks from social to refresh your mind and ideas.
It’s good to get away for a bit and concentrate on other aspects of your photography. Consider reading more blogs like this or checking out industry websites.
Instead of just browsing, take the time to read or watch some new videos.
Beginner Mistakes #8: Not assisting more seasoned photographers
I look back, and I wish I reached out to more experienced photographers for help. On-site and hands-on learning would have made a big difference in my initial learning.
I was scared and never took a chance. Learning from videos and reading is great, but it’s also the hands-on experience that will help you succeed.
Solution for being scared to ask
In the beginning, I thought no photographers would ever allow me to assist and join their shoots. I was scared and nervous to ask, but it turns out many would love the help.
This is a great way to shadow others and see their creativity in action. You might not always get a “Yes” answer from every photographer you ask, but I’m sure there’ll be at least one experienced photographer in your area who would allow you to assist and learn with them.
Don’t be afraid to ask, and you never know where the experience will lead you. Ask questions and observe in detail how others work. You’ll thank me for it.
Beginner Mistakes #9: Holding down the shutter button and shooting too many photos
Burst mode was my best friend when shooting portraits.
I thought this was the best way to get the best shot without having to think about lighting or composition.
Even when my model was stationary, I kept my finger on the shutter button, and I quickly filled my SD cards. I thought the more photos you took, the better photographer you would be.
This was a big mistake because I didn’t learn from shooting this way.
The solutions to overshooting
Solutions to mindlessly smashing the shutter button including slowing down and thinking your way through each shot. Set your camera to a single shot and try to pre-plan your shot in your head.
There is no need to rush. Think and get more selective about your composition. Consider new angles and get more of a variety of photos.
It can take some practice, but you can learn to slow down and get more creative with your work.
Don't Miss This

Beginner Mistakes #10: Shooting too often and falling behind on editing
Practicing on portrait shoots and doing TFP model sessions was a blast my first year, but it was also attributed to one of the hardest lessons I learned as a creative.
Too much practice was wearing me down. I kept scheduling shoot after shoots, and I became overwhelmed very quickly.
I needed to work with everyone who messaged me, which turned out to be a mistake.
The solution to over scheduling shoots
Get selective and shoot with more intention. I didn’t like to say no to anyone, but I needed to consider what I wanted my portfolio to look like.
Shoot with intention and think long term. Practice portrait shoots that will help you build your portfolio and get you closer to your desired jobs or style.
Don’t get overwhelmed and fall behind on editing. This is a sure-fire way to get burned out with portrait photography. Set expectations and have clear communication when delivering final edits.
If you fall behind, don’t be afraid to communicate this with your team. The more you communicate, the better off you will be. Learn to manage your time and set shoots further apart if you need time to catch up.
A quick recap of beginner mistakes
- Stop shooting wide open all the time
- Work on your lighting
- Let models pose themselves and give feedback
- Make each shoot a collaboration and not one sides
- Stop over processing your images
- Stop purchasing tons of presets
- Take breaks from social media
- Ask for help and reach out to experienced photographers
- Shoot with intention and a portfolio in mind
- Stop shooting all the time and falling behind
Beginner photography mistakes mean you’re learning
You can’t learn if you don’t make mistakes. Portrait photography is not an exact science and should be fun.
It would be best if you explored but not get bogged down by the technical mistakes you might be making.
We all make mistakes, so be sure to give yourself some room to grow. Don’t be so hard on yourself.
I hope this list of mistakes and quick solutions will help you on the right track for your own photography work.
We all make mistakes but work to get better and learn from other photographers’ experiences.
[wptb id=3129]