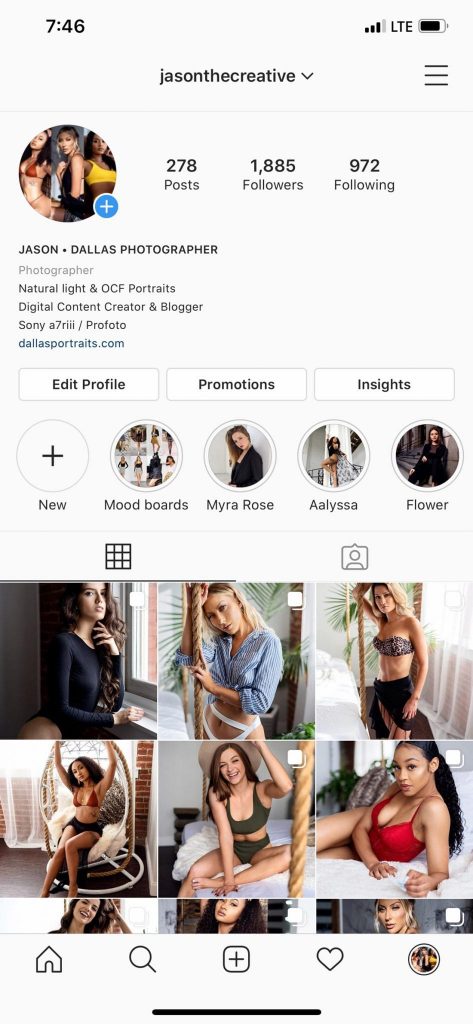
Every portrait photography workflow is different for every portrait shoot. You can ask 10 different photographers, and each will probably give you 10 different answers.
Well today, I want to document my portrait photography workflow and how I approach model test shoots.
Portrait Photography Workflow
A portrait photography workflow is a step-by-step process that photographers follow for each of their portrait shoots. This process involves the process of idea brain storming, mood board designing, booking, final photo editing and delivery. This process can change based on your business needs, but it helps create consistency for your subjects.
I’ll walk you step-by-step thru all the details of how I find models, how I put together test shoots, and how I edit and deliver my final photos.
From gathering ideas and creating small mood boards to using Dropbox for final photo delivery, I will explain each step for you so let’s get started.
What are Model Test Shoots
Model test shoots are photography industry collaborations that allow modeling agencies to build the portfolios of their new or existing models. These shoots allow photographers to test new equipment or build portfolios.
Either way, both parties benefit from the collaboration as the images are used to represent both the model and photographer. These shoots can be paid shoots or T.F.P. (Trade For Portfolio)
What is T.F.P or Trade for Portfolio
TFP stands for “trade for portfolio” or “trade for prints”. Either way no money is traded in TFP shoots and both the photographer and models agree to using the final images for social media, websites and other promotional uses to build talent awareness.
I’ve built my entire portfolio off these industry shoots and this has allowed me to collaborate with very talented models, photographers, make-up artists and more.
Learn more about TFP shoots here and how you can get started.
Workflow breakdown
I will break down all the steps to my portrait photography shoots into three phases to make it easier to review. These phases are
- Pre-production (planning phase)
- Production (shoot day)
- post-production (after the shoot)
Each has a few steps in it and I’ll discuss more about how each step works. All steps are based on doing a model test shoot and coming up with ideas to make a collaboration happen.
Pre-Production (planning phase)
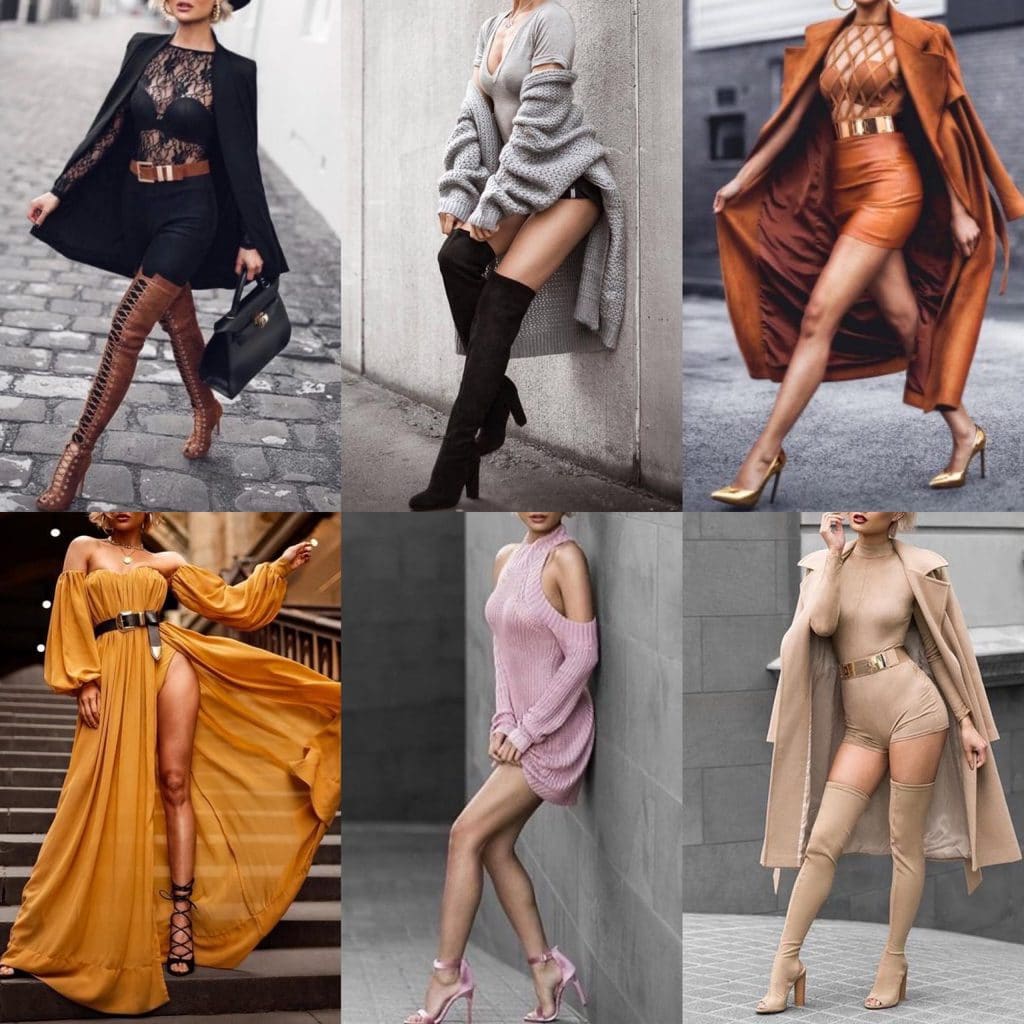
Starting with ideas & building concepts
The very first step in my process is researching ideas. I’m constantly reviewing websites and apps for ideas and creative styles.
I mainly use Instagram and Pinterest as my main sources of inspiration, but I also use websites like Kavyar.com to look at what magazines are interested in publishing.
This gives me a baseline for the mood and vibe and if I’m interested in submitting my images to magazines for publication. Keep in mind, finding inspiration doesn’t mean copying another person’s work.
Try combining a few ideas together to create your own style for your portrait shoot.
Think about colors and textures and the story you would like to express within your images. This can heavily influence your final outcome of the shoot. Think of models like actors and they are telling your story via static photos.
Create Mood boards
I save all the images I like into mood boards on Pinterest and also download them to my phone. Once I have about 6-8 images, and I use Layout by Instagram to put them together into a single image. This way it’s easier to send to models and other people in the collaboration. I can have around 2-3 mood boards for each portrait shoot.
I find this gives my models enough ideas to gather clothing, accessories and any other props needed for the shoot.

Finalize Mood board & Details
Once I have all the images created for the shoot, I finalize the other details. This will include the location of the shoot and a few shoot times that I’ll have available.
I’ll decide if I need an assistant or if I want to include a make-up artist or stylist to help with the shoot at this time as well. Just depends on the mood boards and how complicated the concept is going to be.
This part stays pretty fluid as I’ll need to find times that’ll also work for the model and any other collaborators for the shoot.
I also need to finalize the location and if I’m using a studio, get it booked. This process usually happens about 7-10 days in advance of any portrait shoot.
Model Calls
Once I have my mood boards done, location selected and studio booked, I put together my model calls. This consists of me posting on Instagram and emailing a few select models that I think might fit the look I am trying to achieve.
I post the images to Instagram along with most of the general details of the shoot. There are times I am only looking for a single model and there are times I will be booking multiple models over the course or a few hours. Just depends on the concept and how much interest there is in the shoot.
I give details like general date, time and location. Then I send ideas for make-up and accessories along with the mood boards for reference. I find this helps narrow down models that are interested or comfortable with certain styles.
Selection of Models and confirmations
Once I start receiving messages, I review the model portfolios to see if they’ve done any other shoots similar to the style I am looking for. This helps with selection and gives me an idea of the features and capabilities of the model. Having a portfolio online is a huge plus and can help with selection.
If I have any questions, I reach out to the potential models via Instagram messenger for more information.
I also may reach out to other photographers I know who may have worked with that same model for references or recommendations.
Email communications
Once I decide on models for my shoots, I email the selected finalists and get them all the details. Communication is key up front, so they know what to expect. I will email them the mood boards along with any other details from the shoot. Date, time, location, etc.
I also stress the importance of bringing a friend or chaperone to the shoot. This is a good standard practice for working with new photographers.
I let them know up front the number of images I will be editing and how long it will take for delivery. Again, communication up front is key to success.
Finalize Wardrobe selection
As a common practice, I always ask my models to take pictures of the wardrobe they’re interested in wearing for a shoot. They lay the clothes on a flat surface with all accessories for each look. This way we can finalize the looks before we get onsite.
My shoots are about an hour in most cases, so I like to get as much pre-planning done as possible before we meet onsite.
Reconfirm availability for the shoot
The day before the shoot, I reconfirm with my models one last time to make sure they’re still available for the shoot.
There are times things come up and they can’t make it out. If I reconfirm and the model is 100% sure they can make it out, then we move forward with the shoot.
I always encourage my models to let me know ahead of time if something comes up. I understand important things pop up and I work to accommodate reschedules as needed.
Production (shoot day)
Portrait shoot day
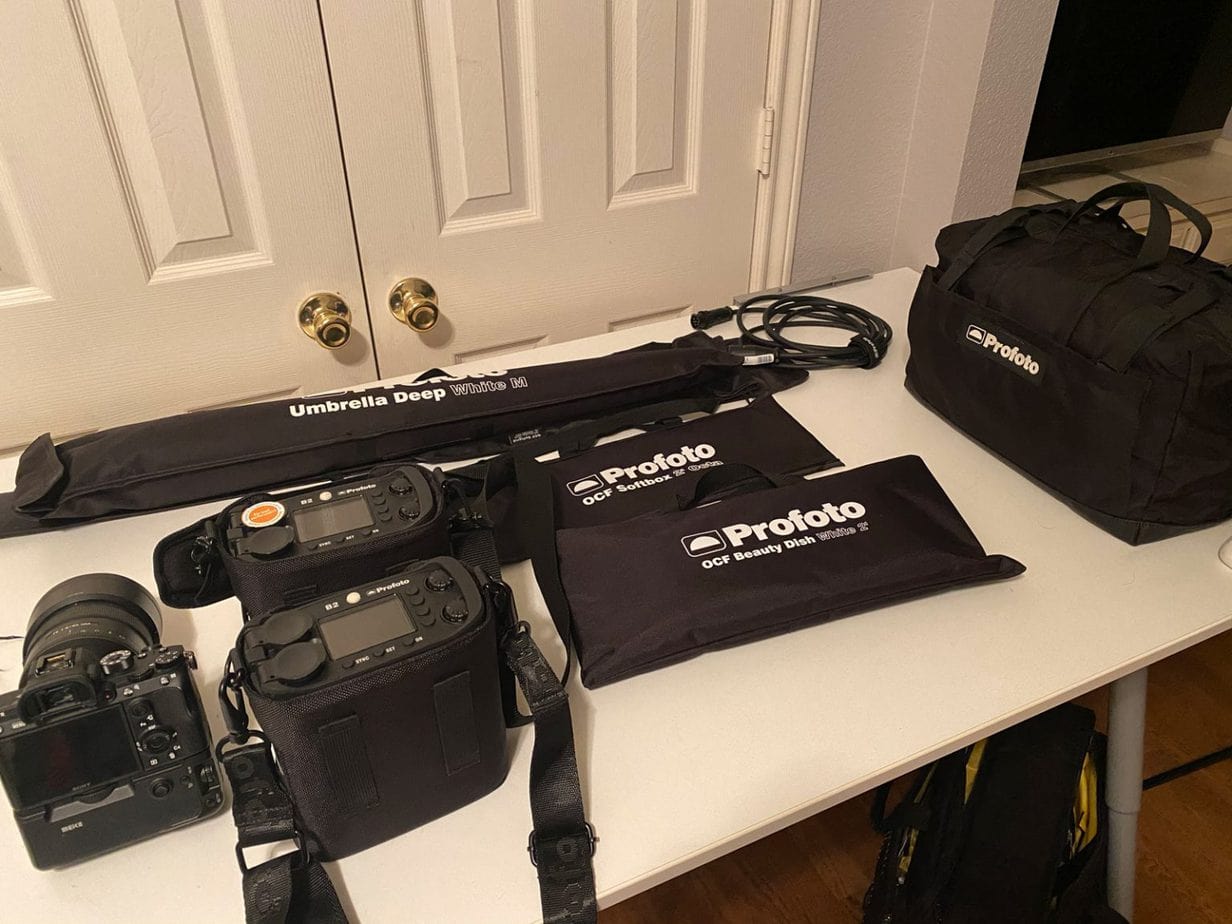
I’ve gotten my shoot days or production days down to a science by now. I think I’ve done over 300 model test shoots over the last few years, so I’ve had some practice. I gather all my equipment the night before and have all my batteries charged and ready to go.
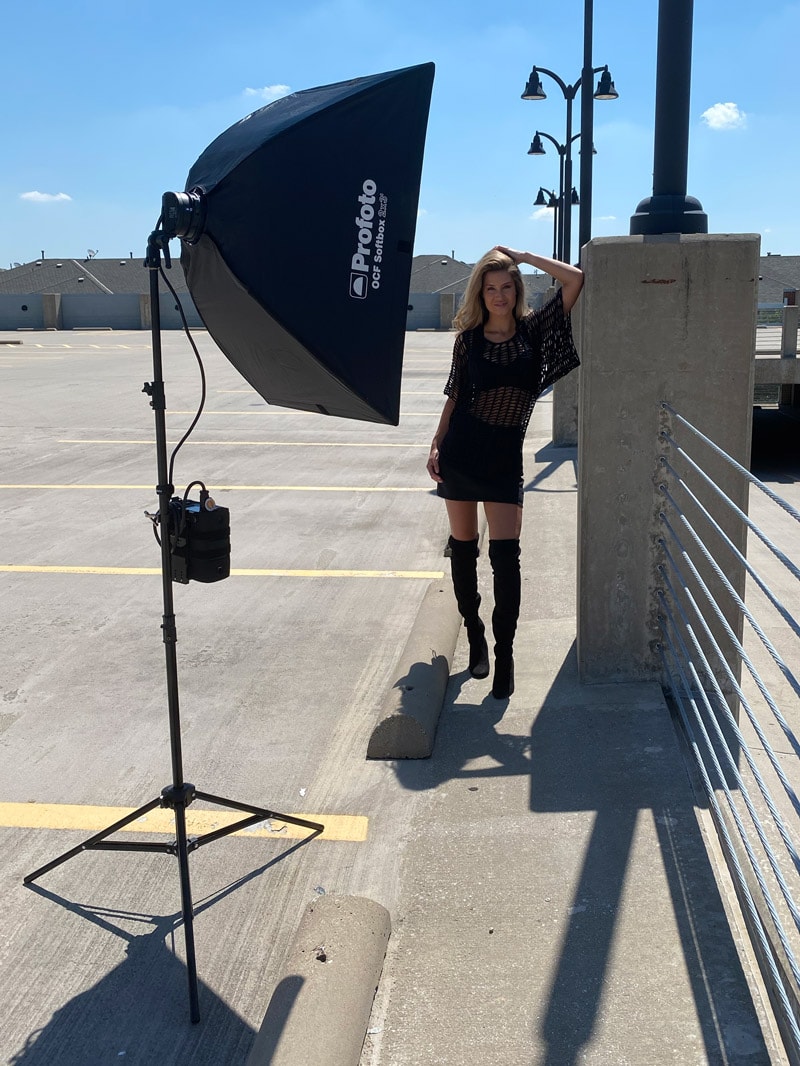
Arrive a little early to shoot location for scouting
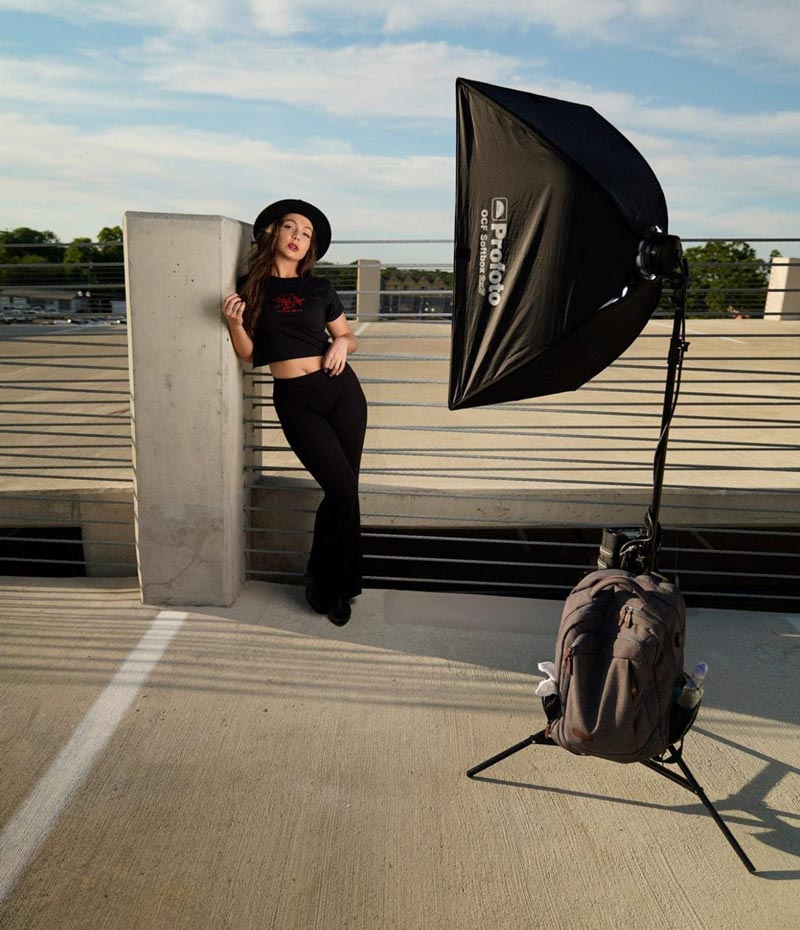
I always arrive to a shoot about 20-30 mins early. This lets me prepare my camera and lighting equipment and also do a small bit of scouting around the area. If the shoot is outdoors, I walk around for a few mins to see all the different backgrounds I can find.
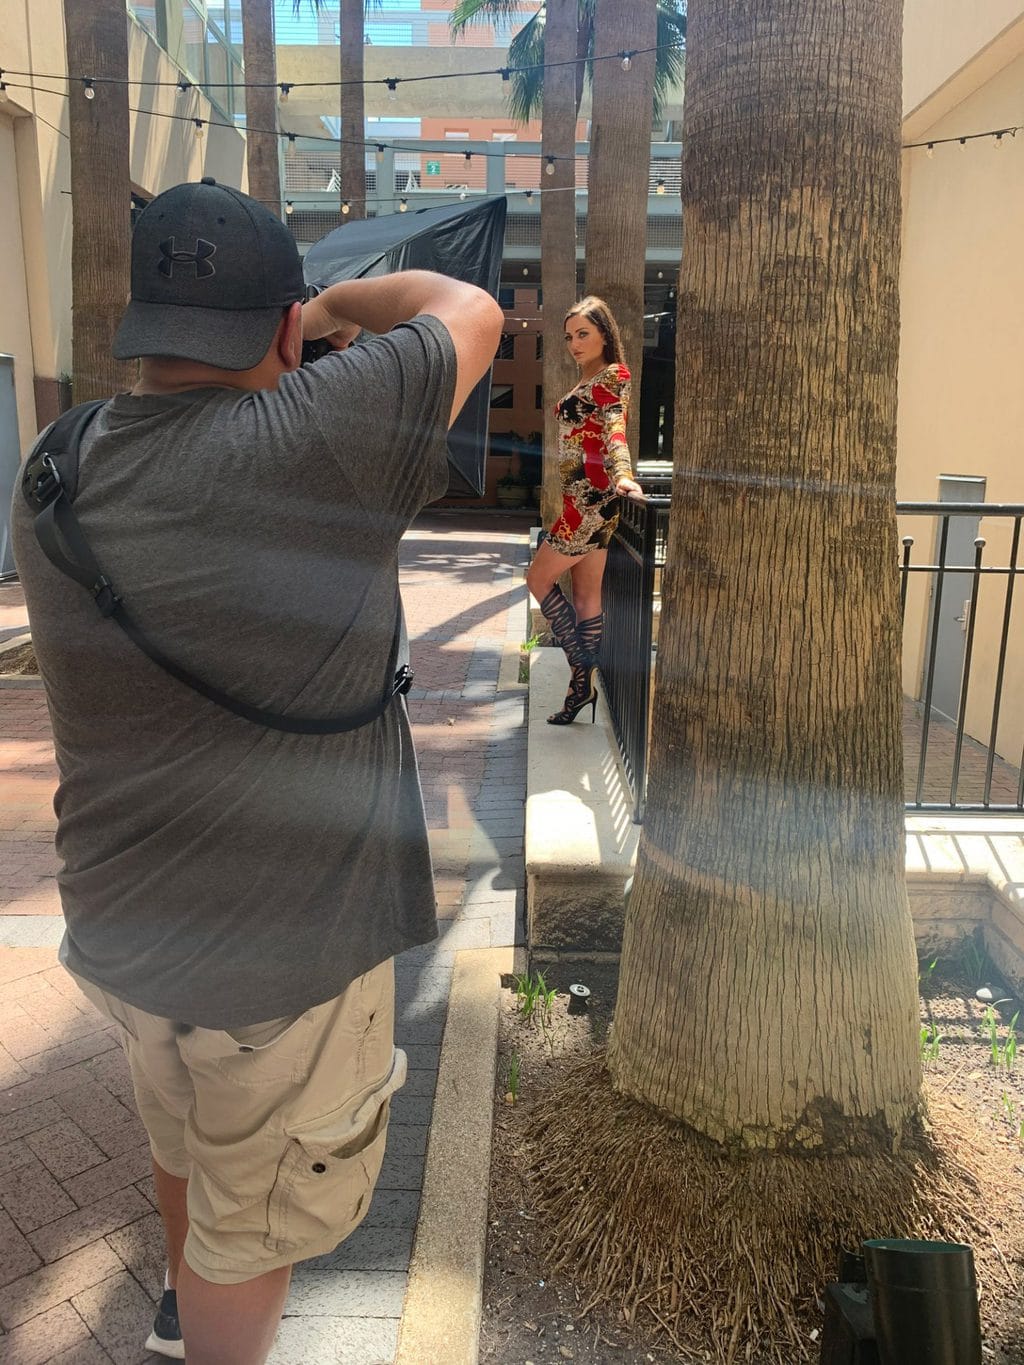
Meet model and prepare for shoot
Once the model arrives onsite, we work through any questions he or she may have and then get started shooting. My gear and equipment are setup and ready to go by this time. I’ve done a small bit of scouting so I’m ready to go to my first location.
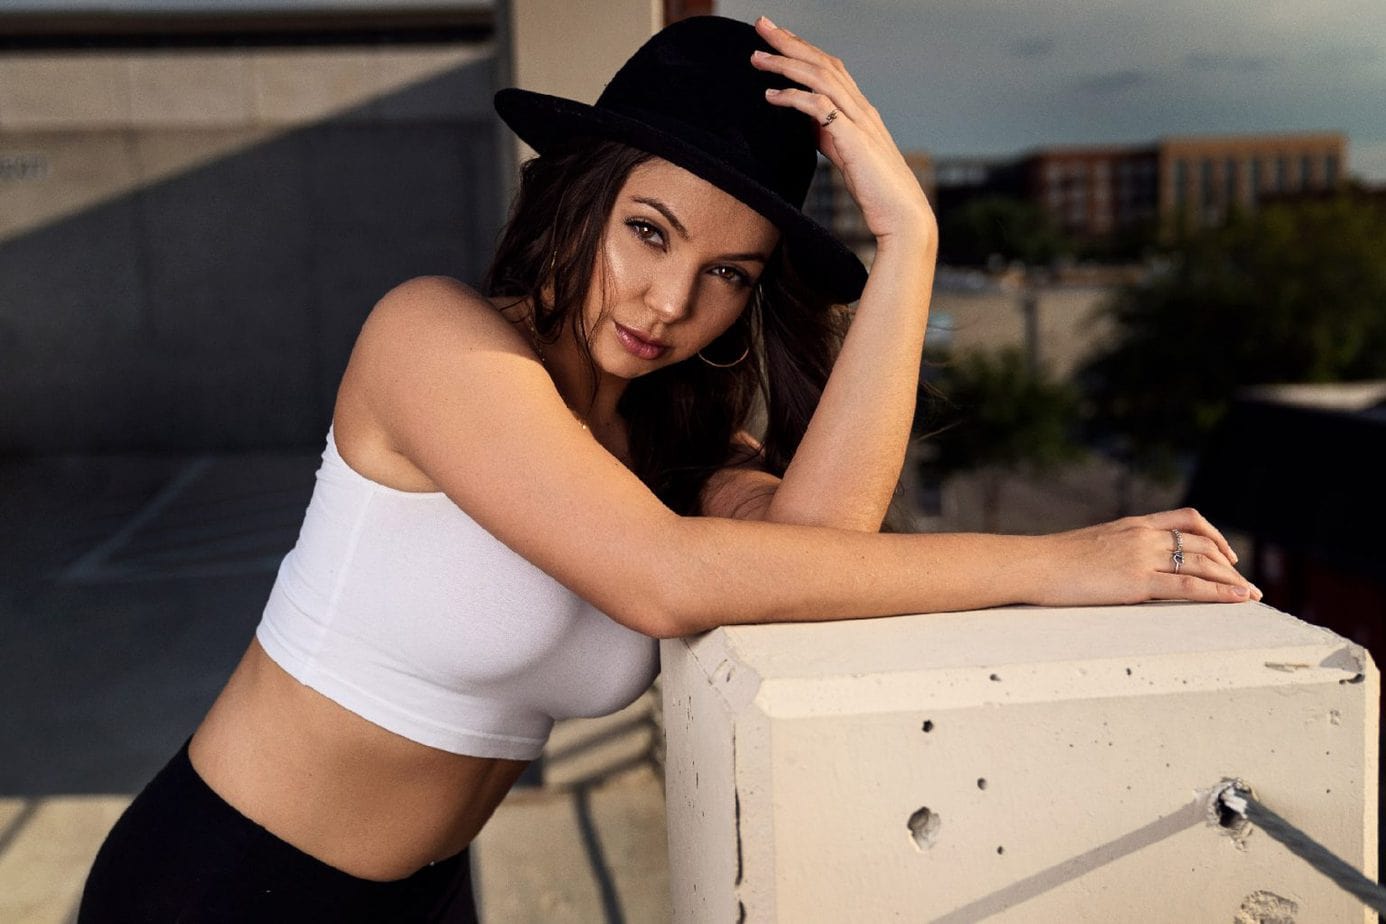
Finally shoot some portraits – 3 looks minimum
The time has come to finally take some portraits. All the work in pre-planning and moodboard creation will finally pay off and I’ll get to shooting.
I always ask the models to layout their 3 outfits. Next, I get them to order them from least to most favorite. I find that models do better as the session gets going.
Move photos to my phone and shoot BTS
During the shoot, I transfer my photos to my phone to give the models a chance to see how the shots are coming out. My iPhone 11 Pro Max has a larger screen than the back of the Sony camera.
JPG’s transfer very quickly so I pic a few to show the model. This also helps me see how the lighting and posing is coming along with the shoot.
Post BTS photos to Instagram stories
When the models are doing wardrobe changes, I post some behind the scenes shots from the shoot to social media. I post mainly to Instagram stories so I can tag the model. This helps build my audience and lets others see what they can expect when working with me.
Finish shooting all looks
Once we have all the looks finished everything gets packed up. I show the model any additional examples from the shoot by transferring the JPGs to my phone. I make sure to walk the location to see if anything was left behind before I leave.
On way home I transfer all JPGs to my phone via WIFI
One the way home, before I start my drive, I set my camera to transfer all photos to my camera. This way I can check them out when I get home. It’s a fast way to view the JPGs and gives me a head start on culling images.
Thank the model again when I get home
Once I’m home, I send the models and other team members a quick thank you for coming out to the shoot. I also reiterate that I will be editing the photos and selecting the top 10-12 photos from the shoot. I try to select about 3-4 images per look.
Transfer all photos to my computer hard drive
The first thing I do when I get home is take out the SD cards and move all the photos to my computer hard drives. I have to make sure I make a back-up of the session. It’s an anxiety thing.
Set batteries to charge and clear card
Once all photos are moved, I place the SD card back into the camera and format the card. This way it is ready to go for the next session.
I also set all my batteries to charge. This way I know for sure they are ready to go for the next set.
Post-Production (after the shoot)
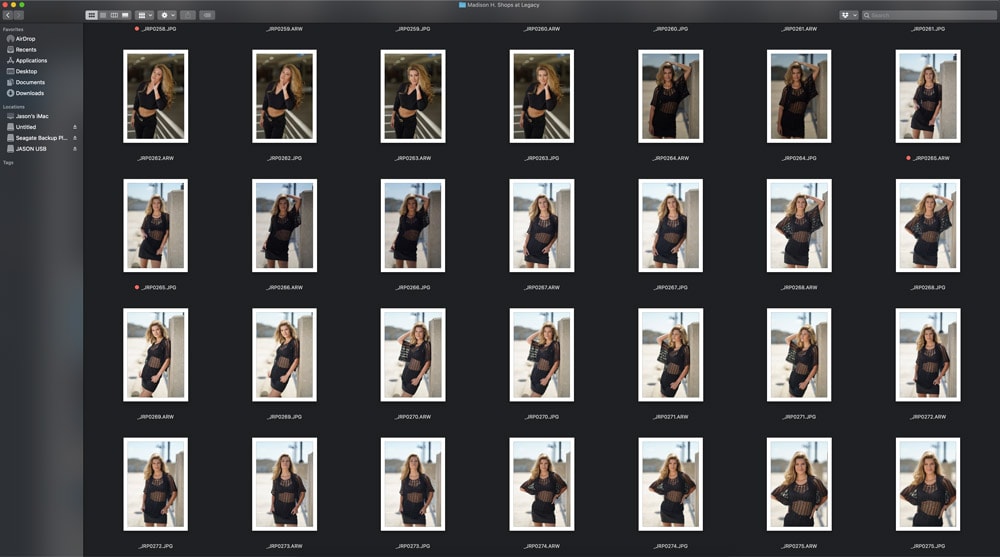
Culling process – Tagging the best photos
Within the next 24 hours I work to review the images and start the culling process. I don’t pull the images into any special programs. I use the Mac OS explorer to tag all my best photos red.
During this stage I also delete out any photos that are blurry. I look for photos that make the model look weird like closed eyes or weird facial expressions and I delete these as well.
The best photos are tagged in red, and others I tag in blue. If a photo is tagged in blue then I may revisit it later to see if it will make the cut.
This process can also be done in your favorite editing programs like Capture One or Adobe Lightroom. I choose to do it outside of these programs, but you might like starting there first.
Starting with Adobe ACR in Photoshop
Once I have all my photos tagged, I start the editing process. I edit a single photo at a time when I’m in editing mode. Starting with the .RAW file, I drag my RAW files to Adobe Photoshop and this automatically opens Adobe ACR (Adobe Camera Raw).
I have all my presets in ACR saved and ready to use. I apply my base preset to each photo and then tweak details as needed. This can be exposure, highlights, sharpening and anything else I need to change before moving into Photoshop.
Don't Miss This
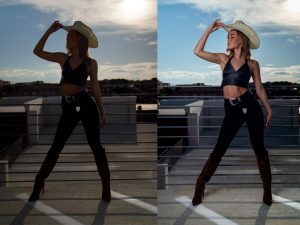
Photoshop Portrait workflow
After my preset has been applied to my photo and all small tweaks have been made to the RAW file, I bring the photo into Photoshop, and the real in-depth editing begins. Here is my detailed workflow for portrait editing.
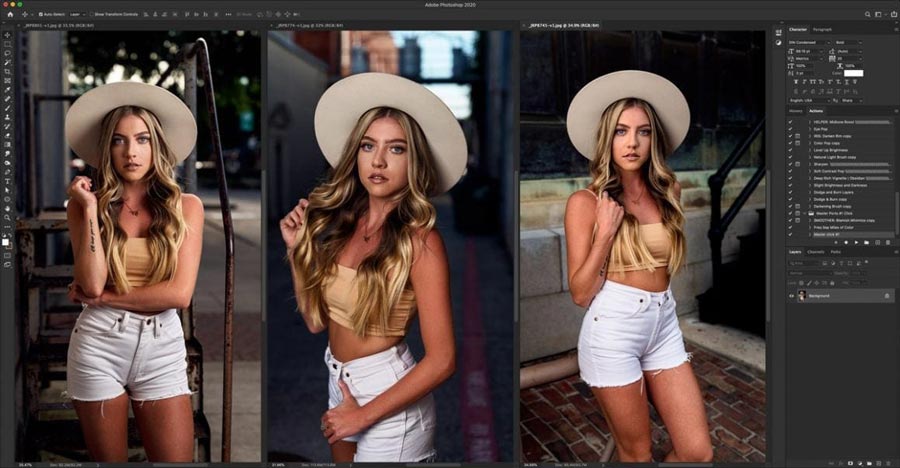
Skin editing and blemish removal
Like with all photos the first thing I do is remove any unwanted skin blemishes from the subject. This can include small red spots, acne, or any other temporary blemish on the skin. I usually do not remove beauty marks or moles as these are apart of the characteristics of the face. I also remove any fly-away hairs or any other distracting objects from the background.
Frequency separation
Next, I run my frequency separation action for skin cleanup. This action separates the skin texture and color into 2 separate layers.
Skin Layer Cleanup
Once the action is completed, I start with the skin tone layer. I use a small to medium size brush and push colored tones from one area to another in order to even out any unnatural gradients in the skin. This is a great way to also get rid of dark circles under the eyes. You can do a simple YouTube search for more in-depth tutorials on frequency separation. I highly recommend learning the technique and practicing on your own photos.
Dodge and Burn
After all the tweaks have been made in the frequency separation layers I move onto local dodge and burn. I have an action created that allows me to see any dark or light areas that I may have missed in the previous step. I like to dodge and burn smaller areas of the skin and bring out highlights and shadows in strategic areas like the eyes, or lips so I can make my subject stand out a little more.
Color grading
Once all the skin retouching has been finalized I move into color grading. I have action sets created that add certain consistent color tones to my images. I tend to add blue in the shadows and yellow and reds to the highlights. The same action is added to all my photos so I can maintain a feeling of consistency throughout my photography.
Highlights and shadows
Once color grading is completed; I finish with curves layers for any highlight or shadow adjustments. I like heavy contrast in my images as it adds a small sense of moodiness to the final images.
Final crop of image
Once all highlights and shadows are finished, I crop or straighten the image as needed and get ready for saving the final file.
Saving final image and repeat process
I save all my photos for web at 70% quality resolution. This allows me to keep the file size down while saving the full-sized file for my models. I also save the RAW files as .PSD files so I can always go back and make tweaks as needed to any of my layers.
Finish editing all the photos
This workflow is usually run about 12-15 times for a single editing session. I like to deliver at least 12-15 final images from the session. I have the model in 2-3 outfits and I like to edit about 4-5 from each outfit.
Photo delivery via Dropbox
All final JPG files are then added to Dropbox for final delivery. I load the photos into a single folder named after each model and I send a direct link via email and also on Instagram. The models can download the final files and use for social media and to share with their networks.
Posting to Instagram
I like to schedule my Instagram posts after I have the final images on hand. I will tag the model and location of the shoot so other people can see my work. More importantly other models get to see my work and decide if they want to work with me in the future.
100+ model test shoots and counting
I’ve been very fortunate to be able to work with hundreds of models over the years. I have built great working relationships with many models from around the Dallas Fort Worth area and beyond.
Networking is one of the best parts of all my collaborations and I hope to continue to do these TFP shoots more in the future.
Bonus workflow – Post portrait shoot
Resize final photos for website portfolio
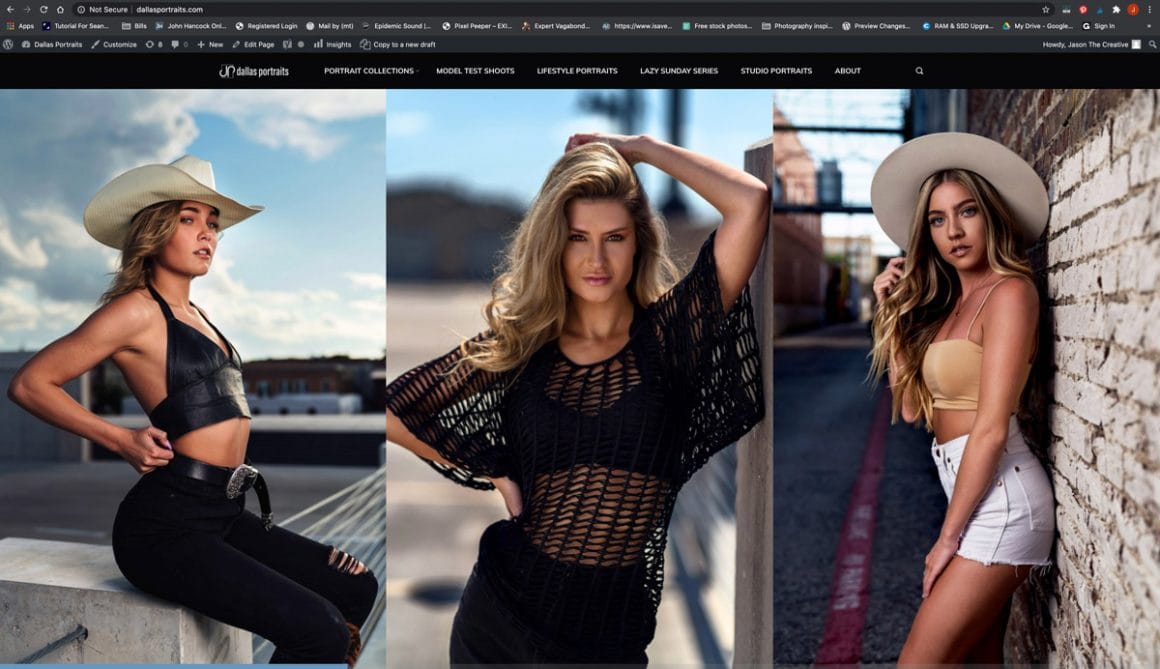
Posting to social is just one aspect of how people find my work. My website dallasportraits.com is the other permanent location to see all my portrait photography. Once I have the final photos from the session I go ahead and downsize the photos to specific vertical orientation for my website.
Upload photos to website and blog about experience
Photos area uploaded and I love to blog about each and every experience. This allows my readers and followers to see how shoots are done.
Start the process all over again
After all these steps are taken, I work to schedule more shoots and start the process all over again. I love shooting portraits so I look forward to the next shoot.
What I’ve learned about this portrait photography workflow
I’ve refined this process over the last 4 years. I made mistakes and learned from these so I could streamline my TFP shoots.
Communication is the key part of the process that I work to get right. If you can manage expectations up front, then you are on your way to a successful shoot.
What I want beginners to understand about this process
There are many workflows and processes for different creatives. Use this as a guide and tweak to fit your timing and creative process. There is not right or wrong answer so go out and shoot and revise as needed.
Conclusion
This portrait workflow may seem long and complicated. Some photographers spend more time on editing and less time on pre-production. This is a choice you will need to make in order to get the best results for your work.
There is no right or wrong answer when it comes to portrait photography workflows. There is only practice and more practice so go out and have some fun.
*Affiliate Disclaimer - I am a proud partner of the various affiliate programs including the Amazon.com Affiliate Program. When you click on my links and make a purchase I make a commision which goes to helping me support this blog. Thanks! |